Big Data Analysis using Snowflake


In this article we will perform data loading & data analysis using Snowflake cloud data warehouse.
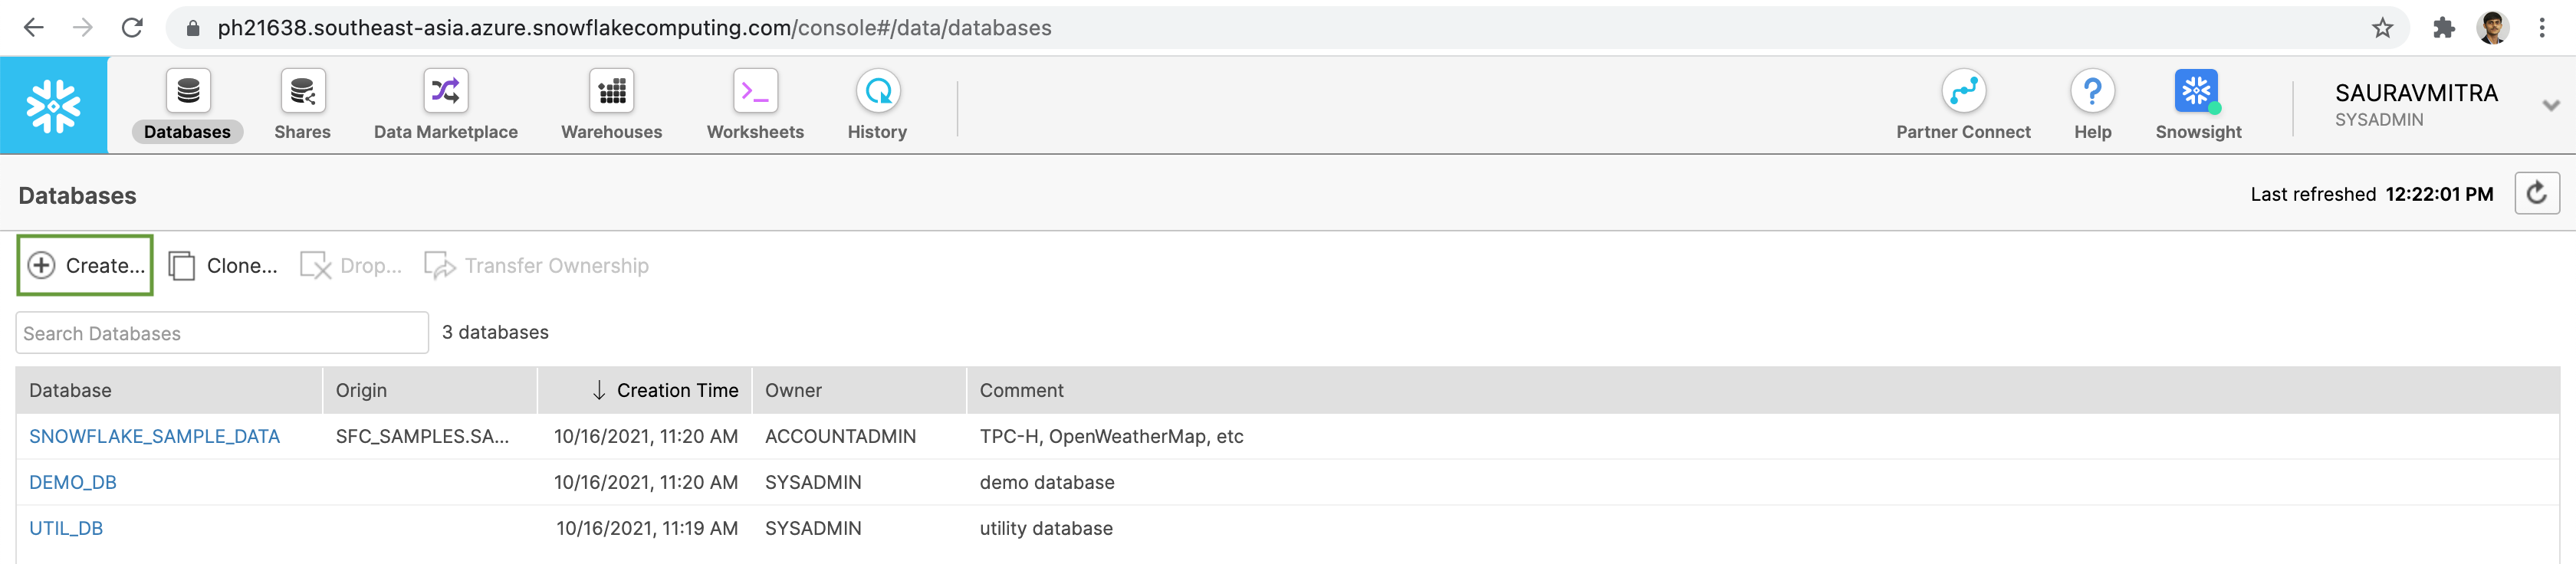
Click on the Databases Page, which shows information about the databases in Snowflake.
Click on the Create button to add a new database for our big data analytics.
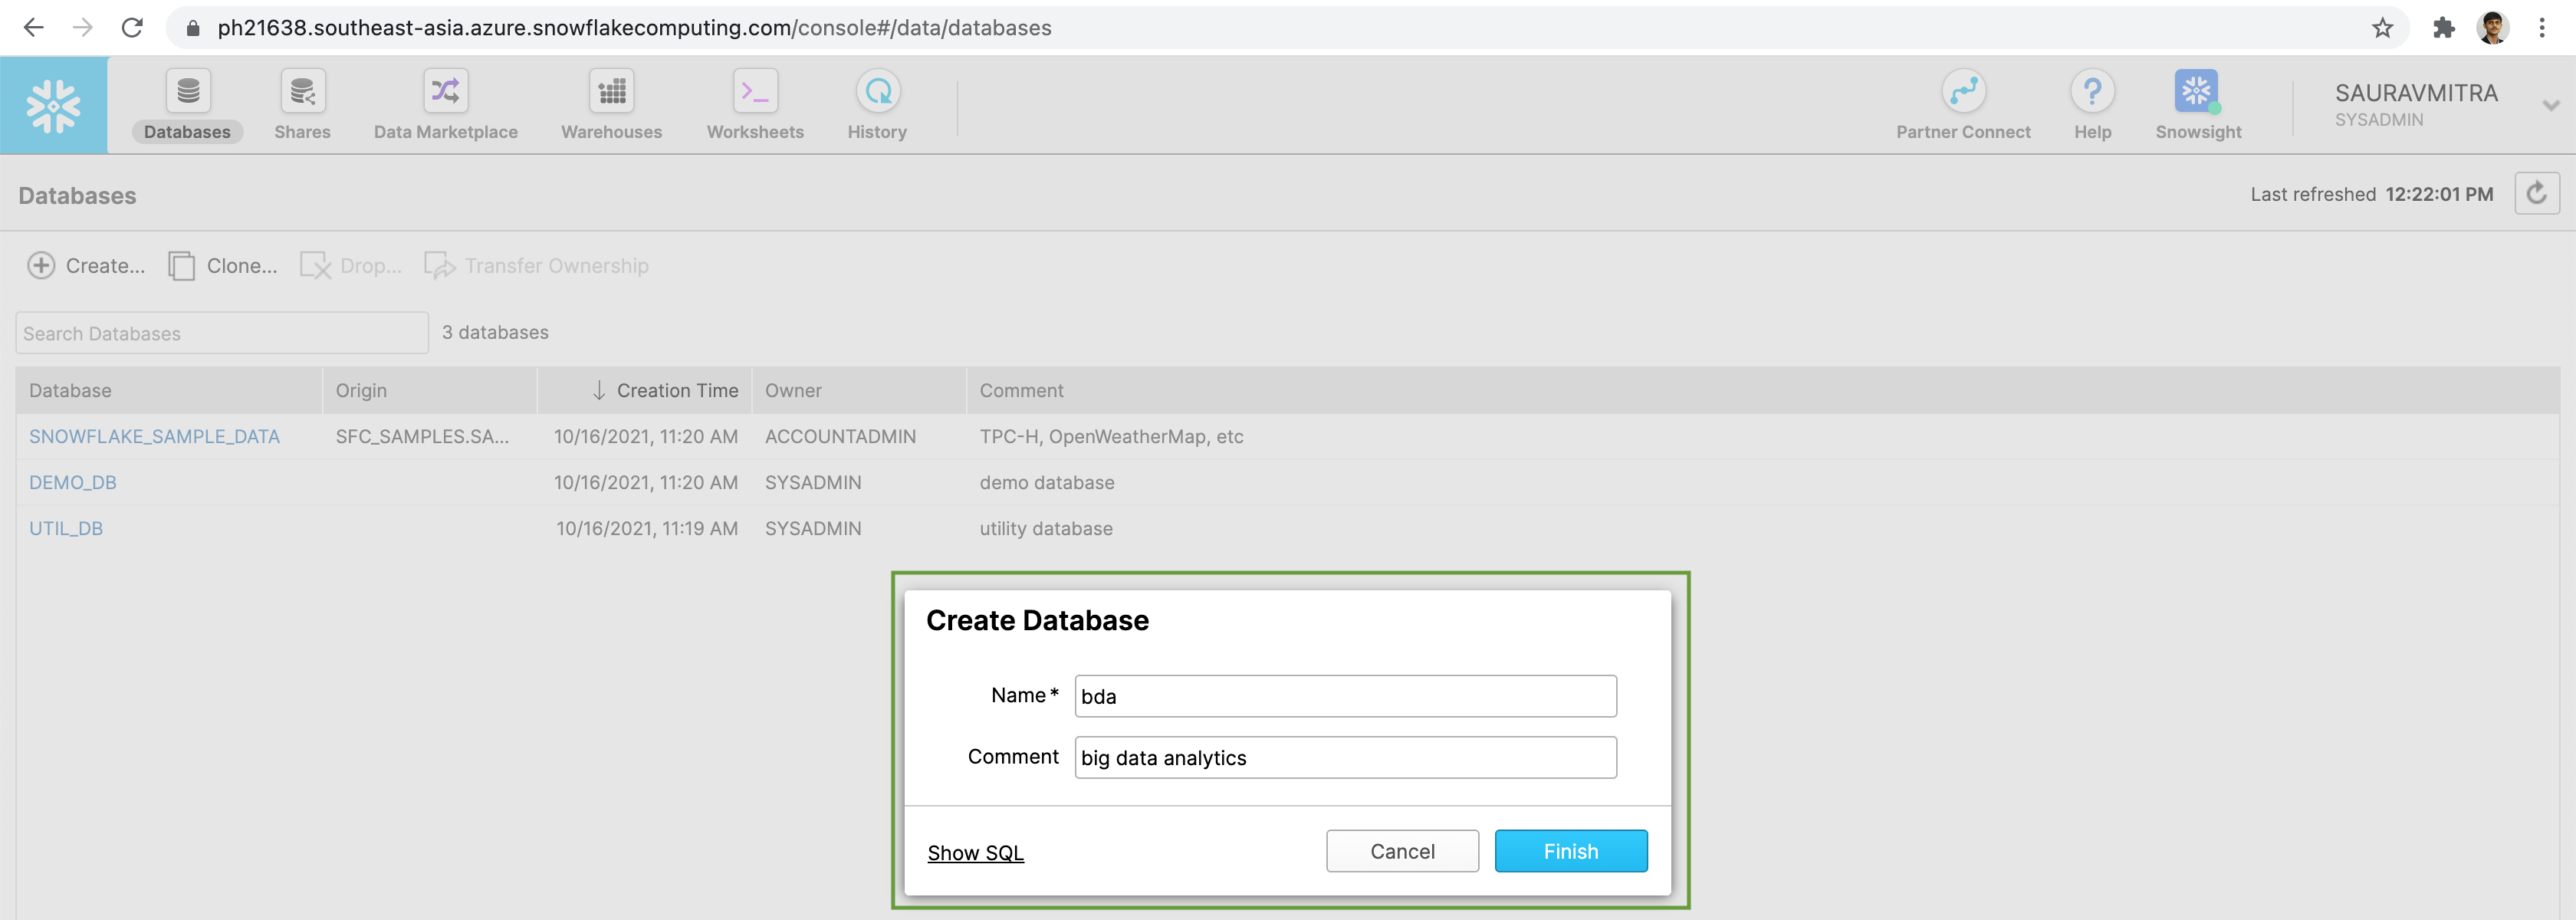
Add a name & comment for the new database.
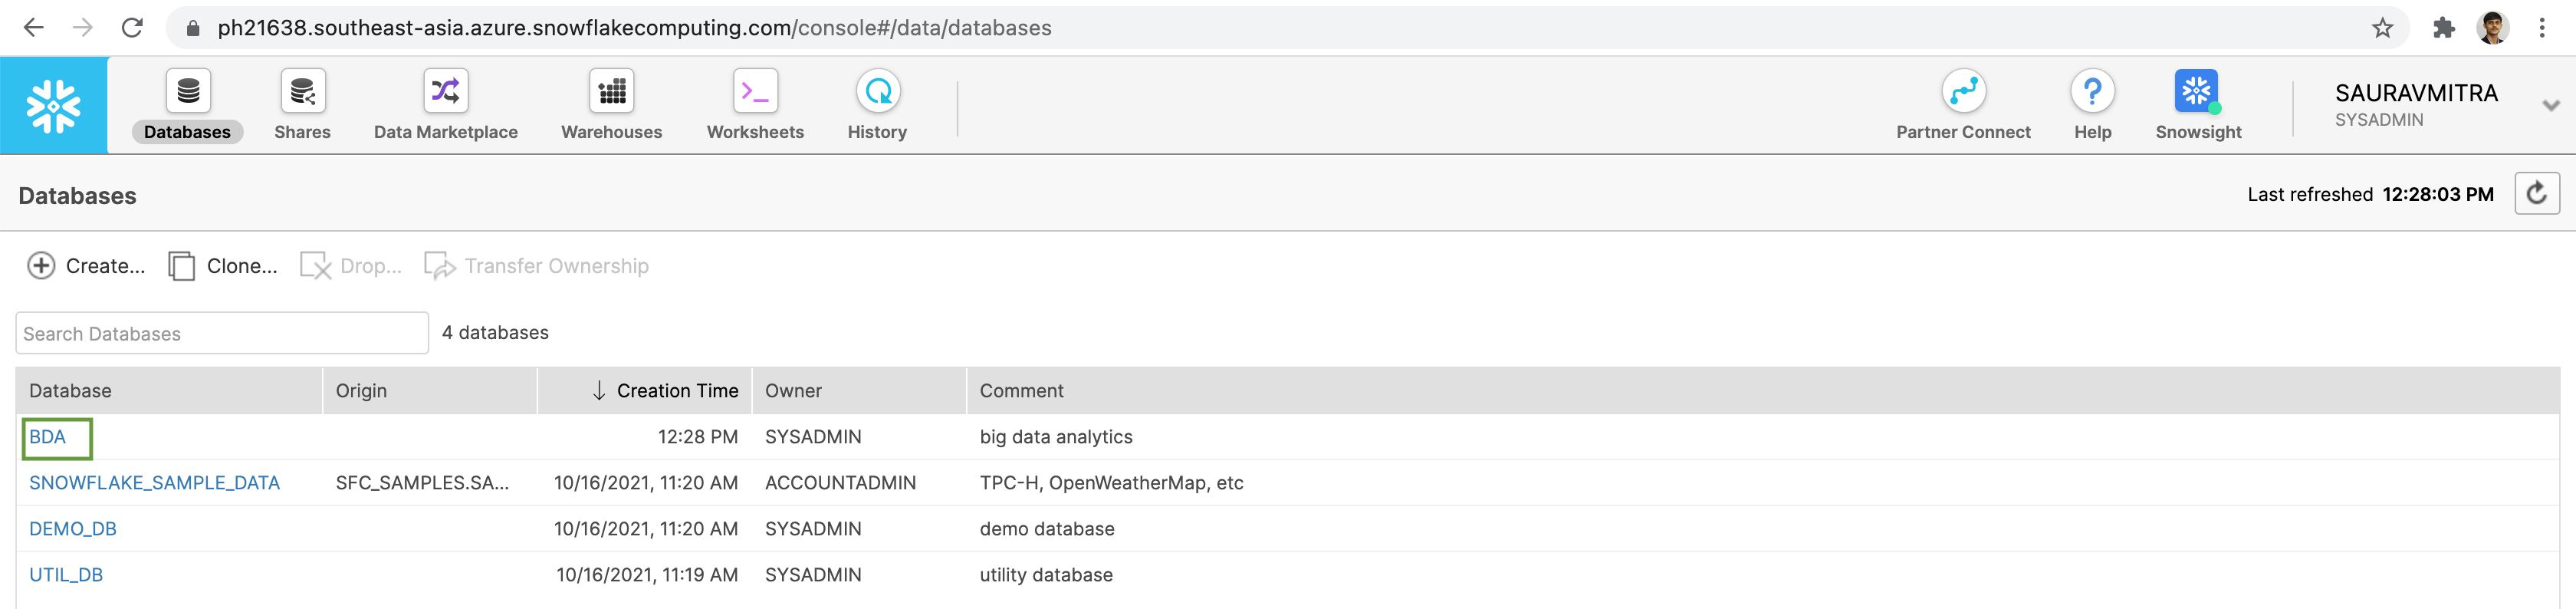
Next click on our newly created database.
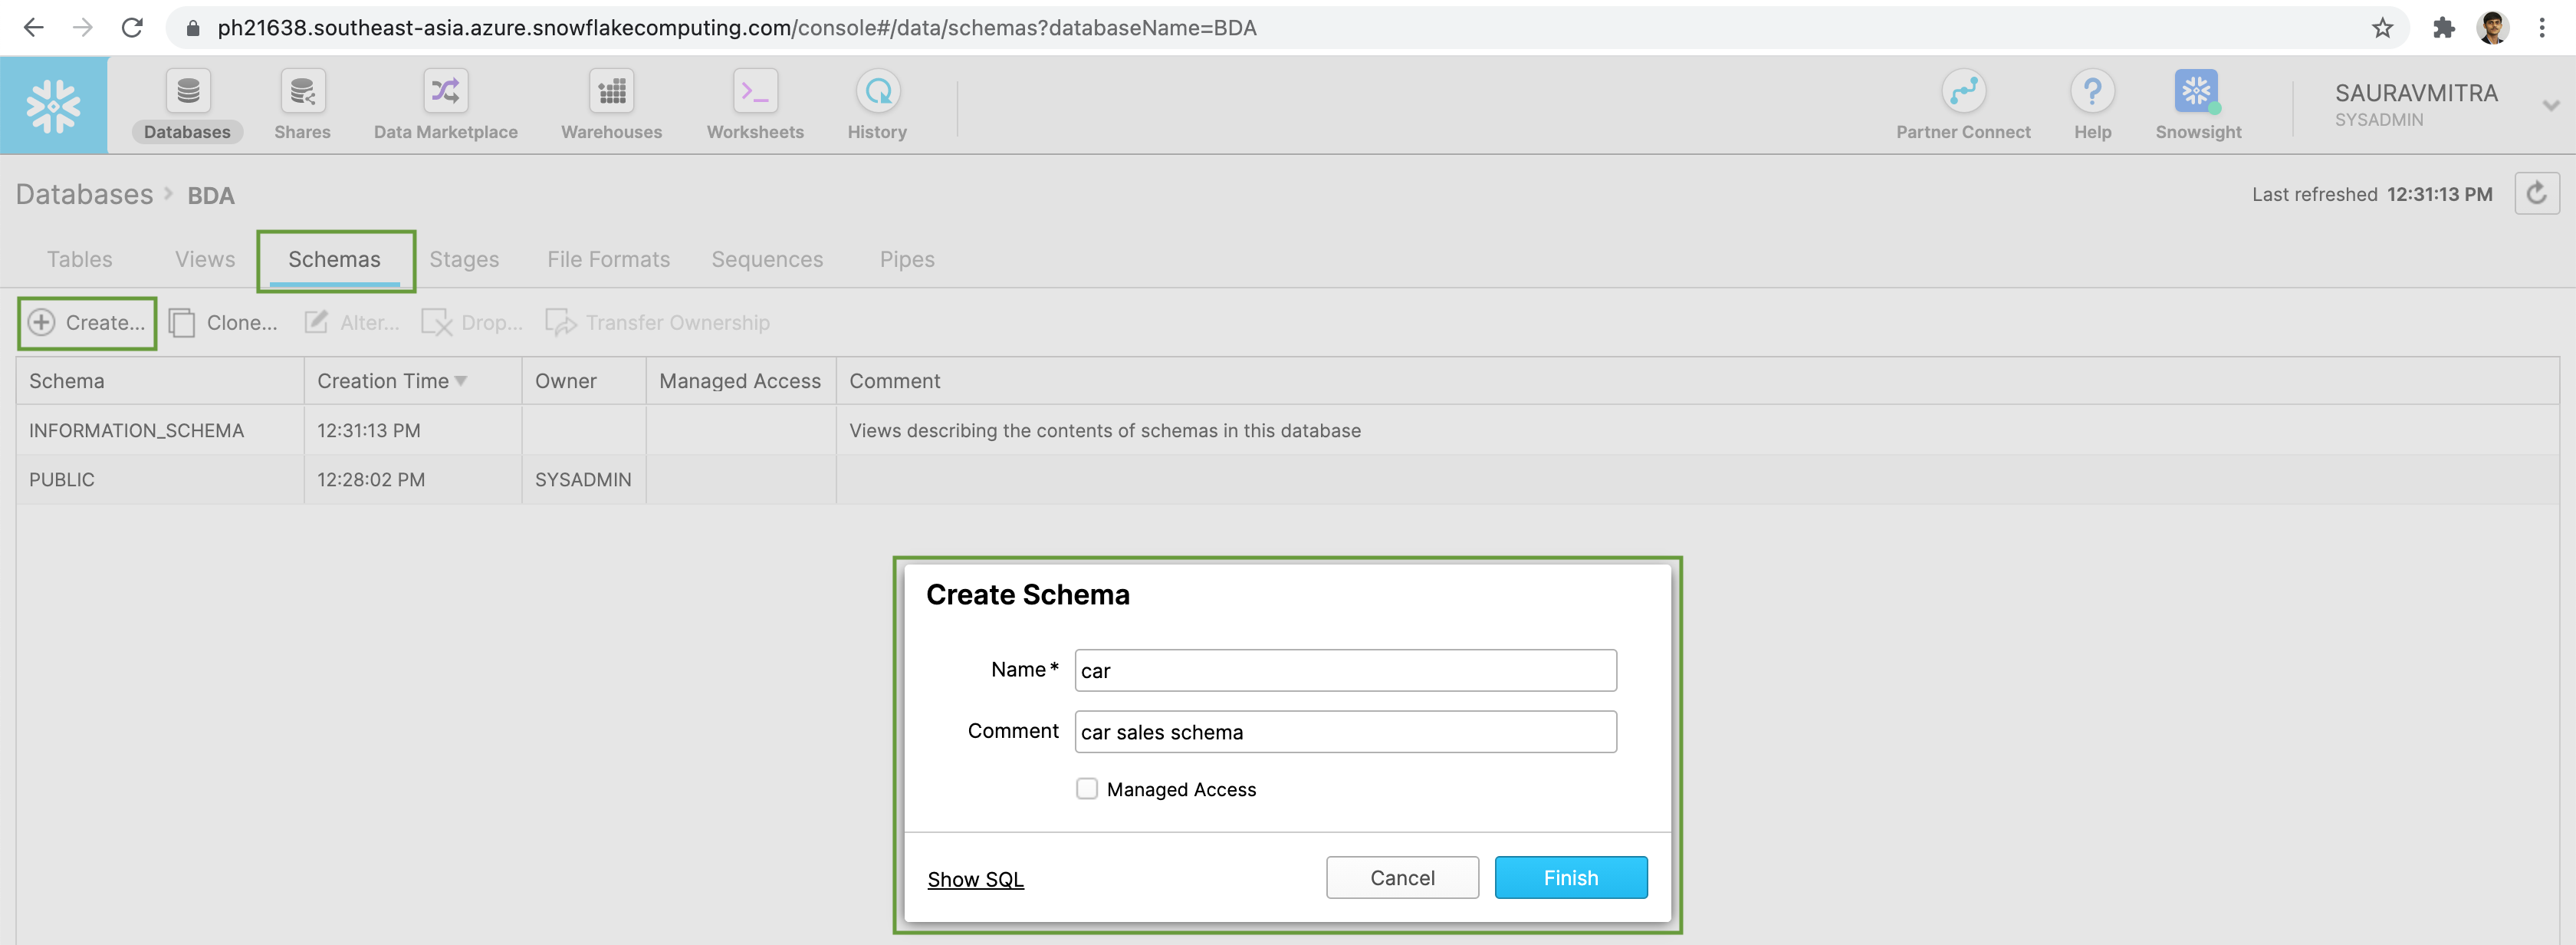
Next go to the Schemas tab & click on the Create button to add a database schema.
Add a name & comment for the new schema.
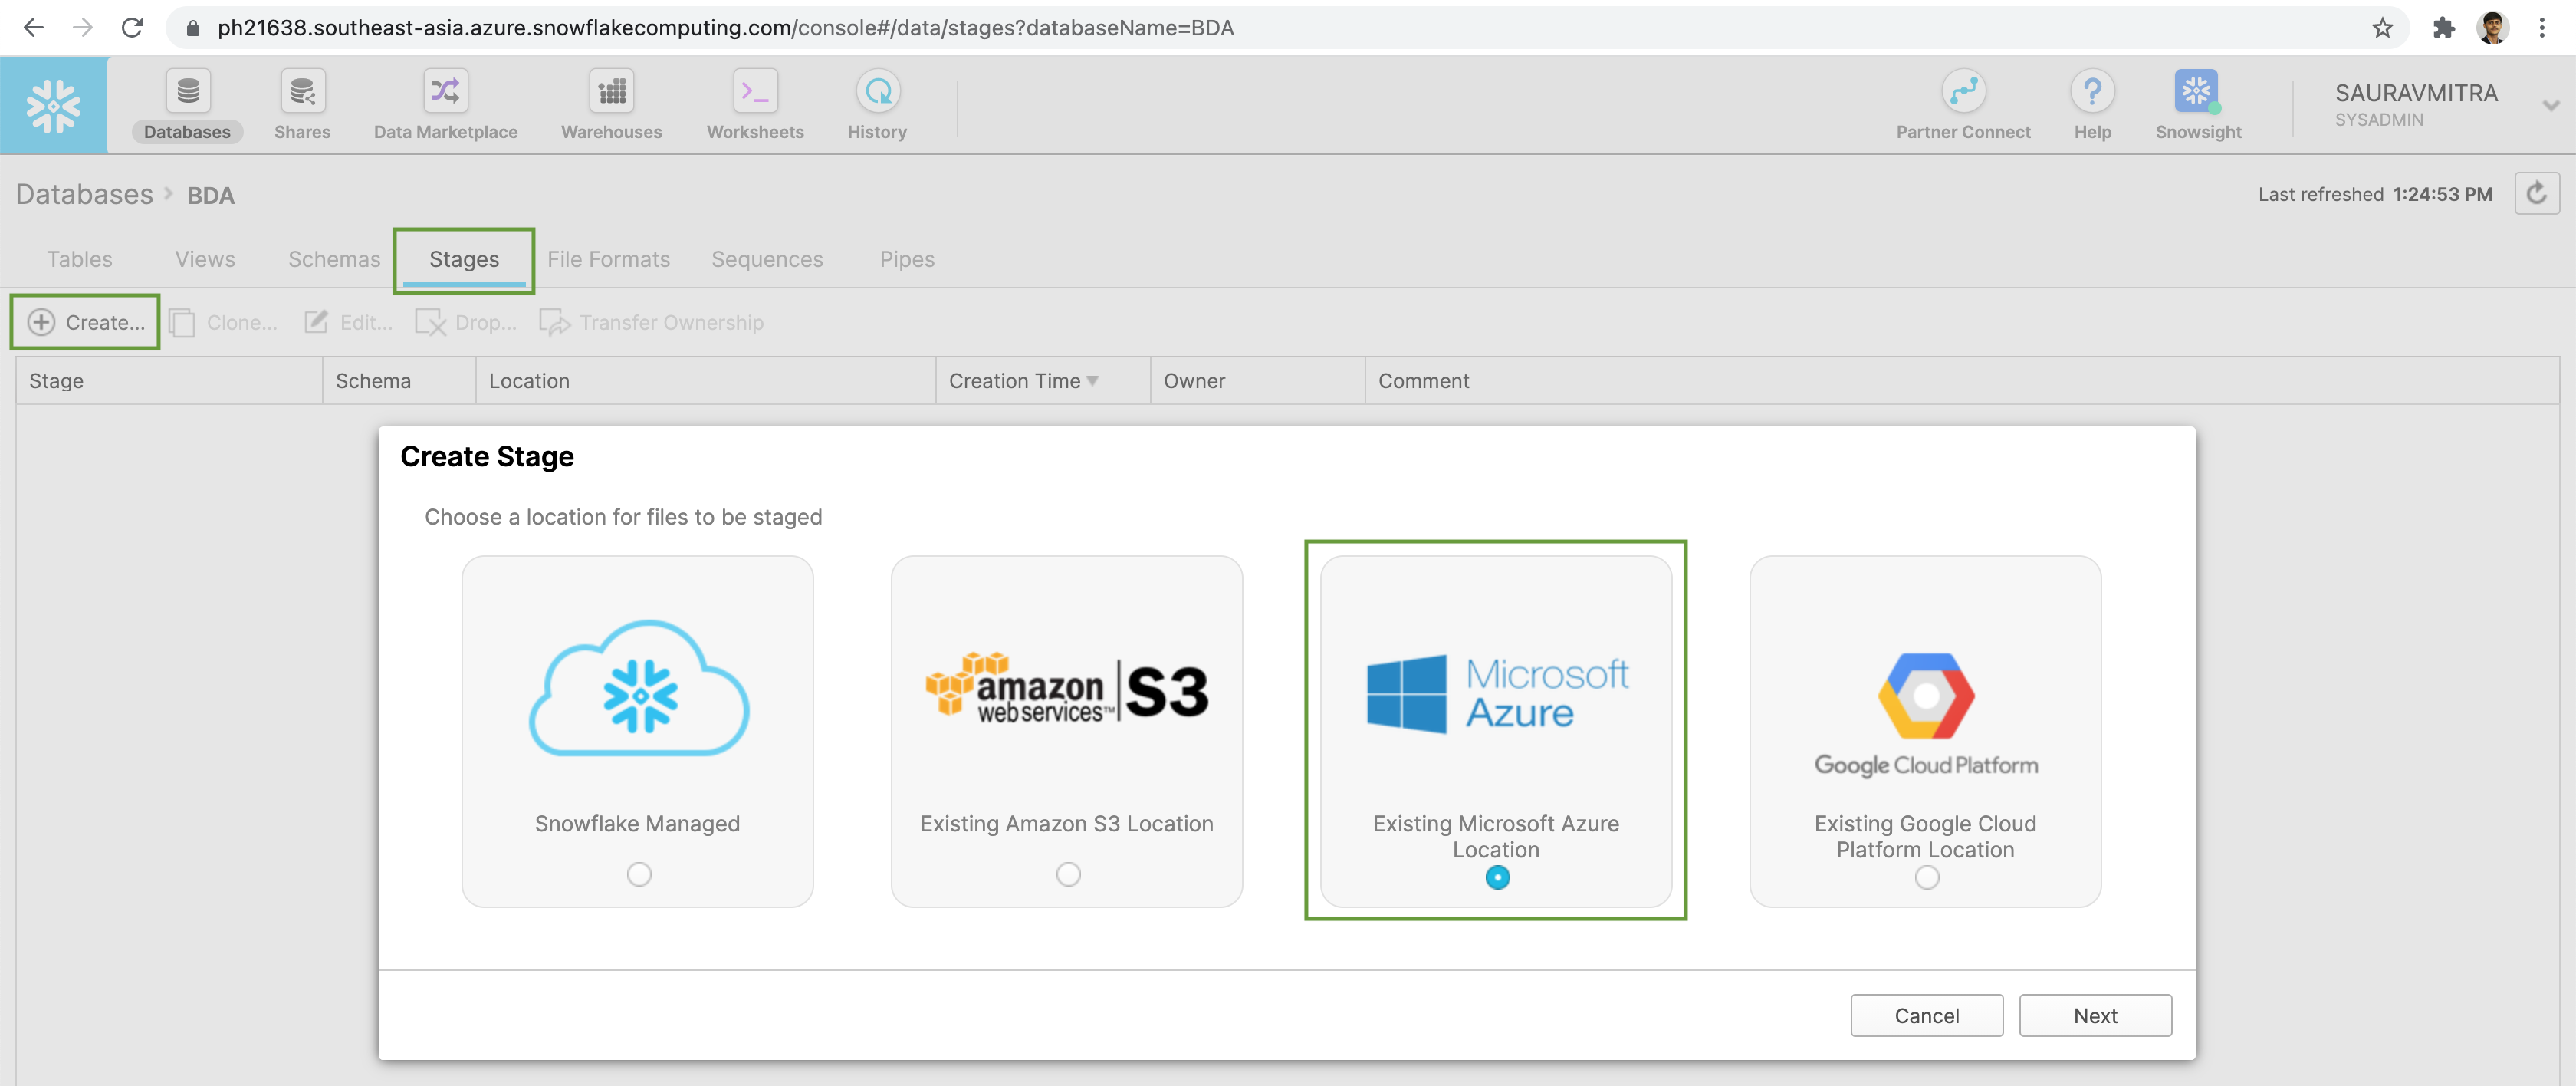
We are going to load some data stored in Azure Blob Storage container for this demo. Go to the Stages tab & click on the Create button to add an external stage. Next select Microsoft Azure as our existing stage.
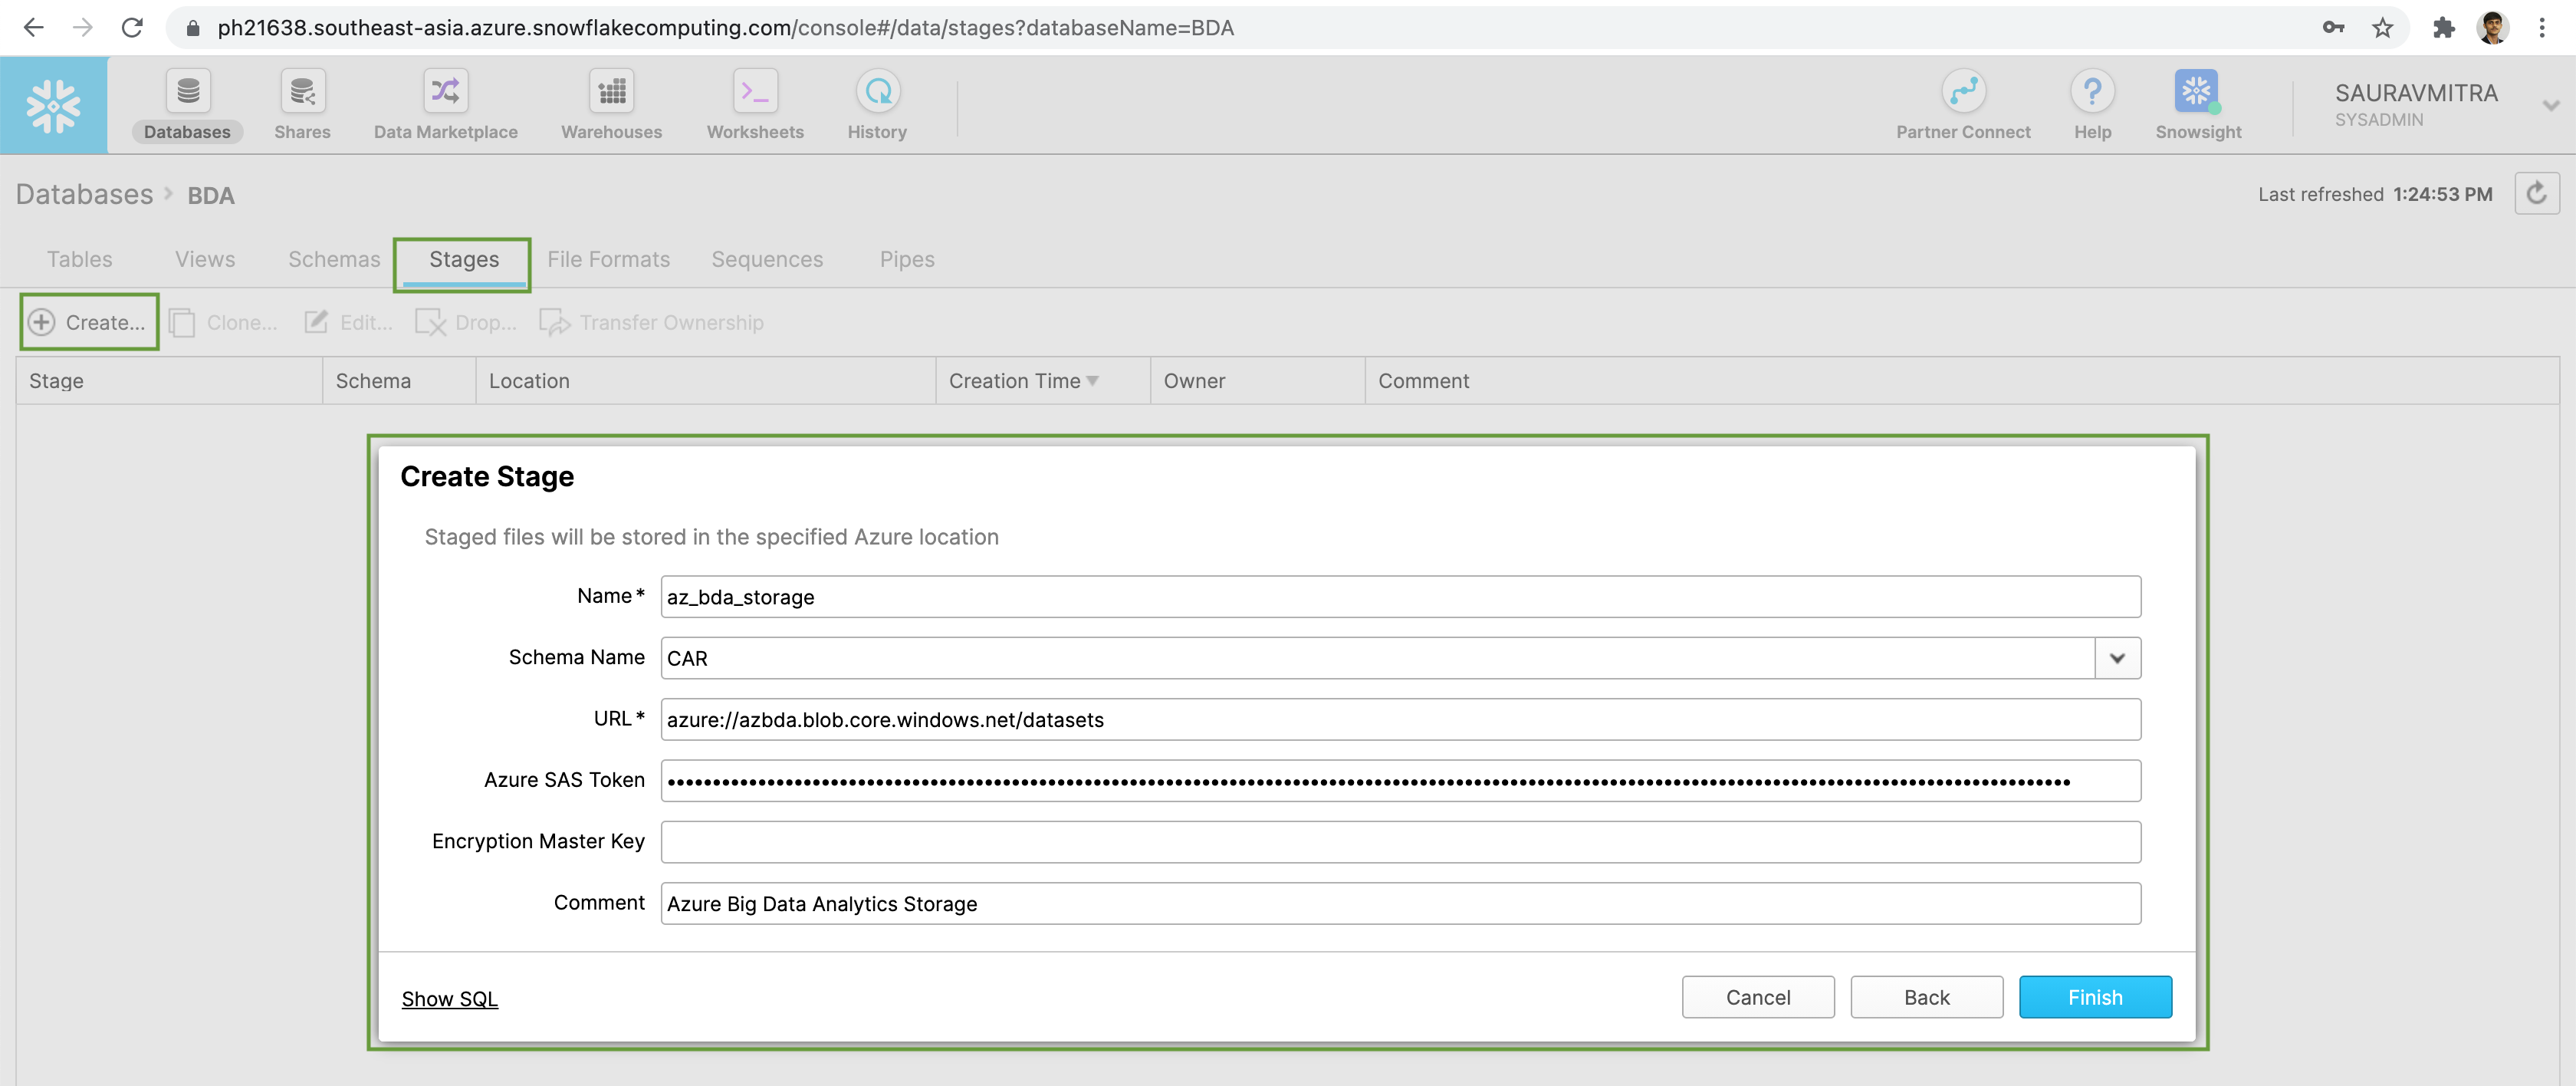
Add a Name & Comment for the stage. Next select the Schema Name we created earlier from the dropdown list.
Next put the azure blob storage container URL & the Azure SAS Token.
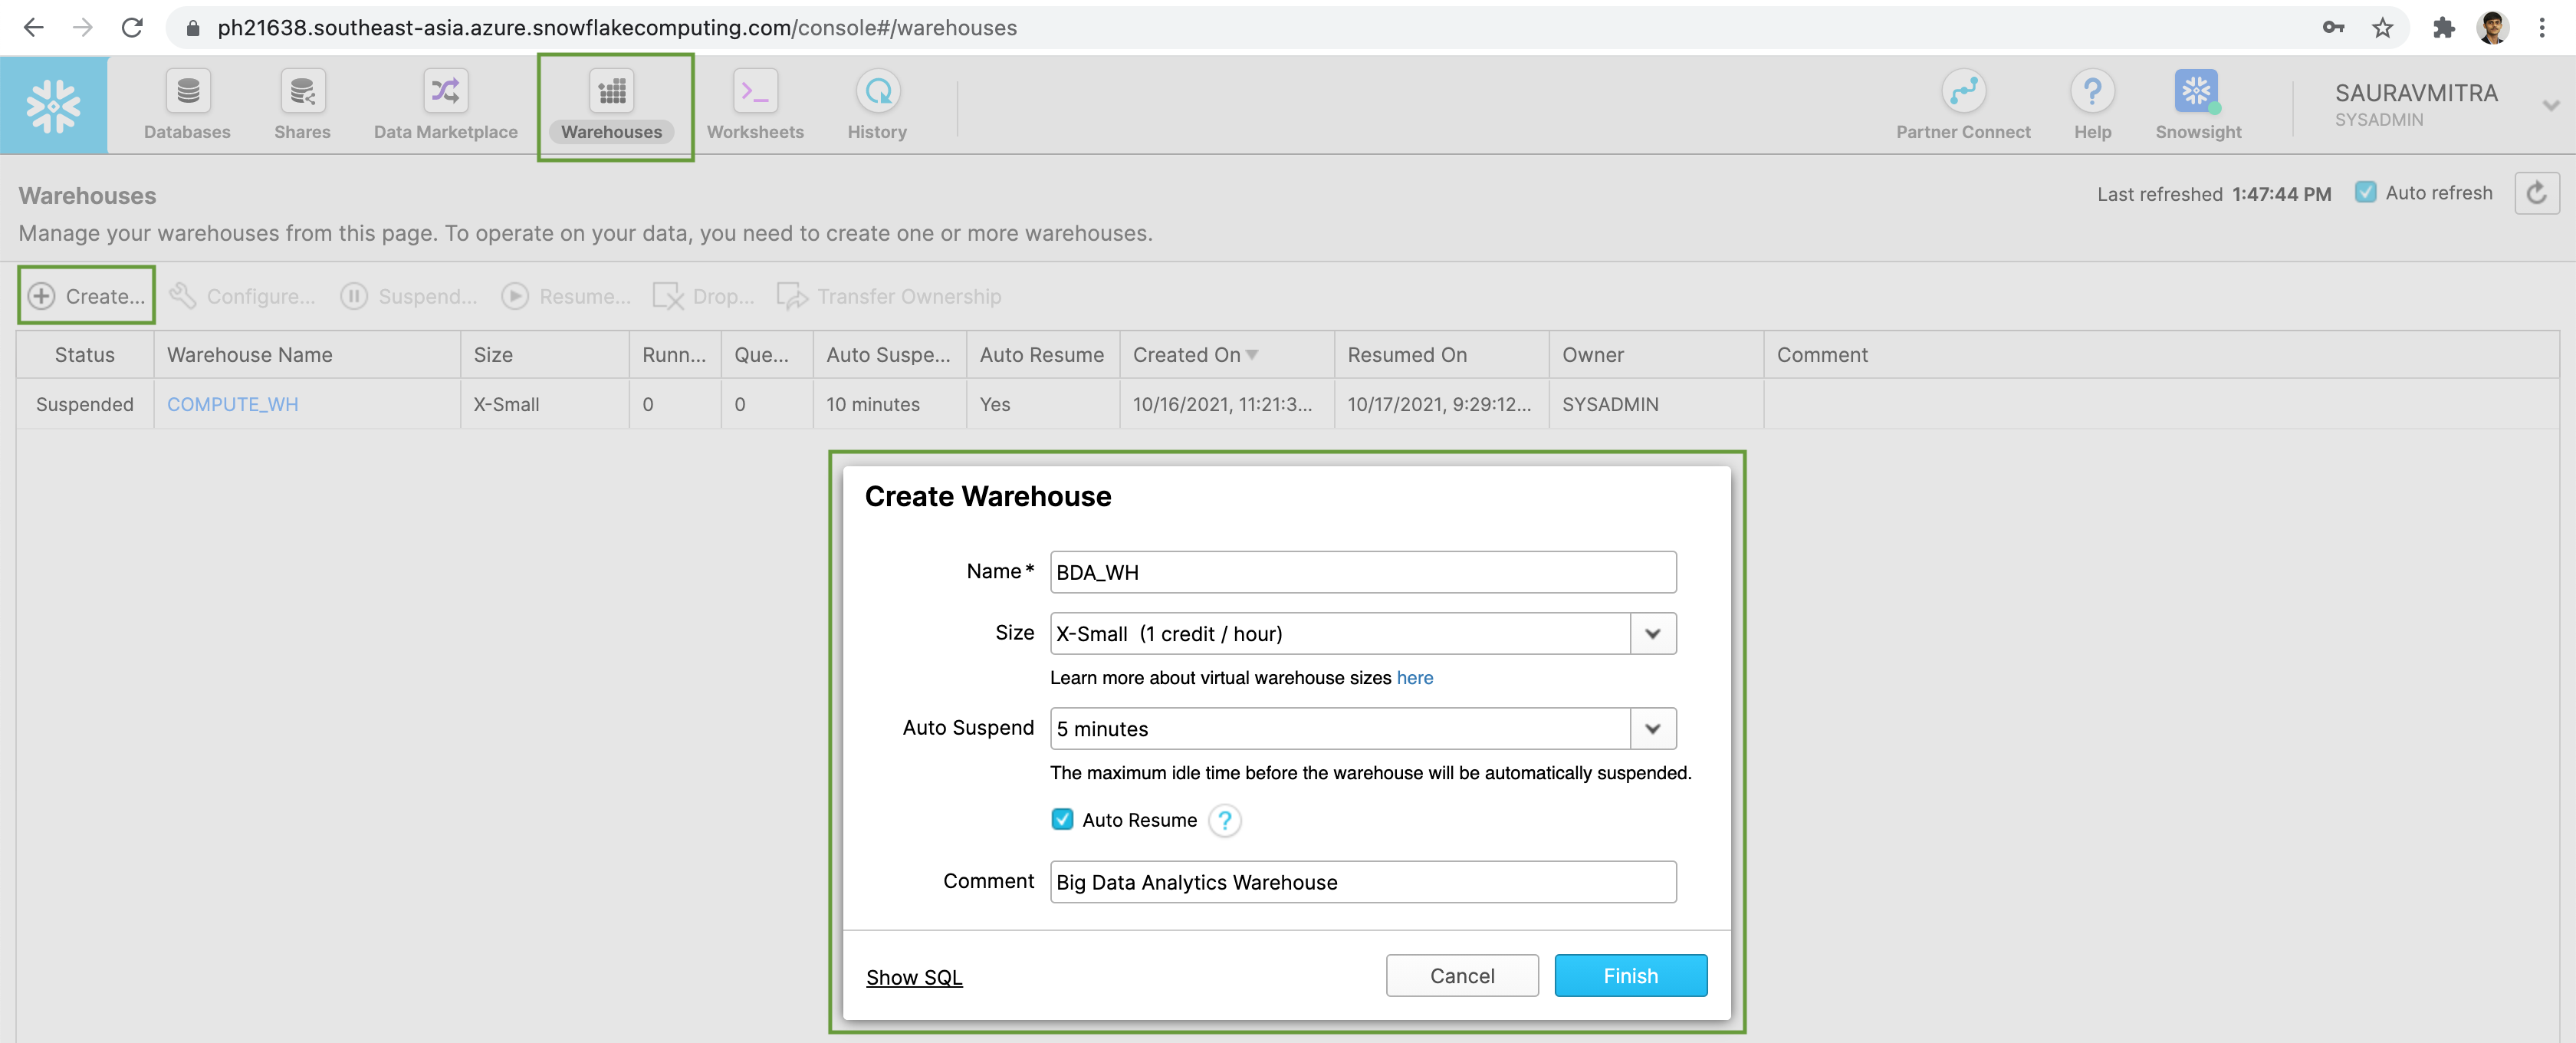
Before proceeding any further, let's validate that the external stage is able to access our data files. For that, first of all let us add a dedicated warehouse for the purpose of our demo.
Go to the Warehouses Page, in order to create a warehouse to operate on our data.
Click on the Create button. Add a Name & Comment to our warehouse. From the Sizes dropdown select the appropriate virtual warehouse size.
Set the maximum idle time to an appropriate value to automatically suspended the warehouse when not in use. Also we will enable the Auto Resume checkbox to resume the suspended warehouse automatically next time, when a query is issued.
Now let's go to the Worksheets page to execute SQL queries. Choose & connect to our database, schema & warehouse.
Let's validate that the external stage can access of data files in azure blob storage container.
-- List Stage
LIST @AZ_BDA_STORAGE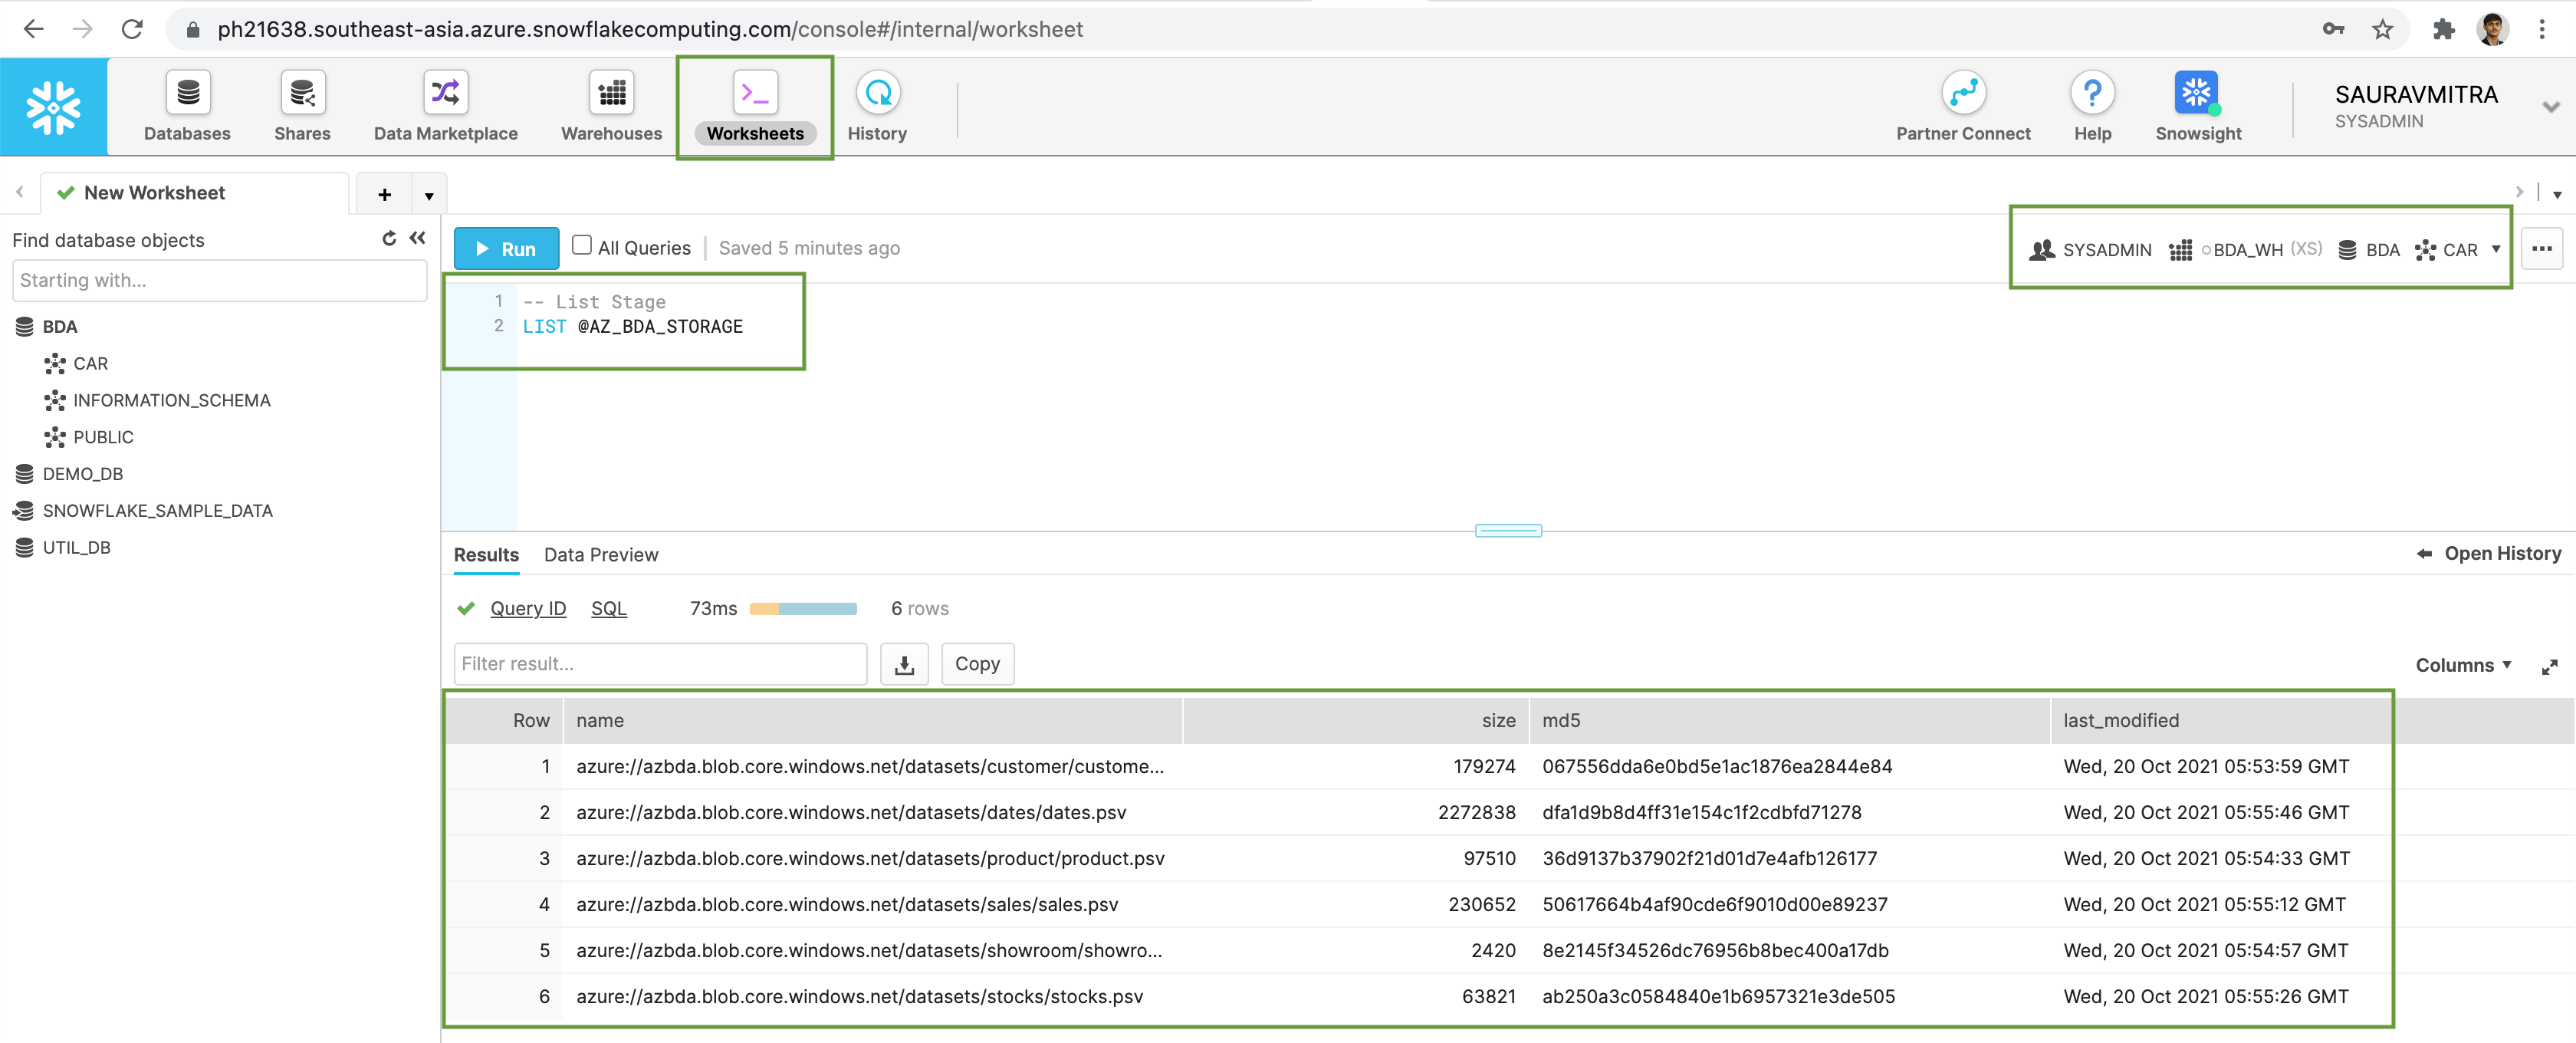
Now that the external stage is able to access external data files, we will go ahead and create & load data in our tables.

-- Dates Table
CREATE TABLE car.dates(
  year_number INTEGER NOT NULL,
  month_number INTEGER NOT NULL,
  day_of_year_number INTEGER NOT NULL,
  day_of_month_number INTEGER NOT NULL,
  day_of_week_number INTEGER NOT NULL,
  week_of_year_number INTEGER NOT NULL,
  day_name VARCHAR(10) NOT NULL,
  month_name VARCHAR(10) NOT NULL,
  quarter_number INTEGER NOT NULL,
  quarter_name VARCHAR(2) NOT NULL,
  year_quarter_name VARCHAR(6) NOT NULL,
  weekend_ind VARCHAR(1) NOT NULL,
  days_in_month_qty INTEGER NOT NULL,
  date_sk INTEGER NOT NULL,
  day_desc DATE NOT NULL,
  week_sk INTEGER NOT NULL,
  day_date DATE NOT NULL,
  week_name VARCHAR(7) NOT NULL,
  week_of_month_number INTEGER NOT NULL,
  week_of_month_name VARCHAR(3) NOT NULL,
  month_sk INTEGER NOT NULL,
  quarter_sk INTEGER NOT NULL,
  year_sk INTEGER NOT NULL,
  year_sort_number INTEGER NOT NULL,
  day_of_week_sort_name VARCHAR(7) NOT NULL
);

COPY INTO car.dates FROM @AZ_BDA_STORAGE/dates/ file_format = (type = csv field_delimiter = '|' skip_header = 1);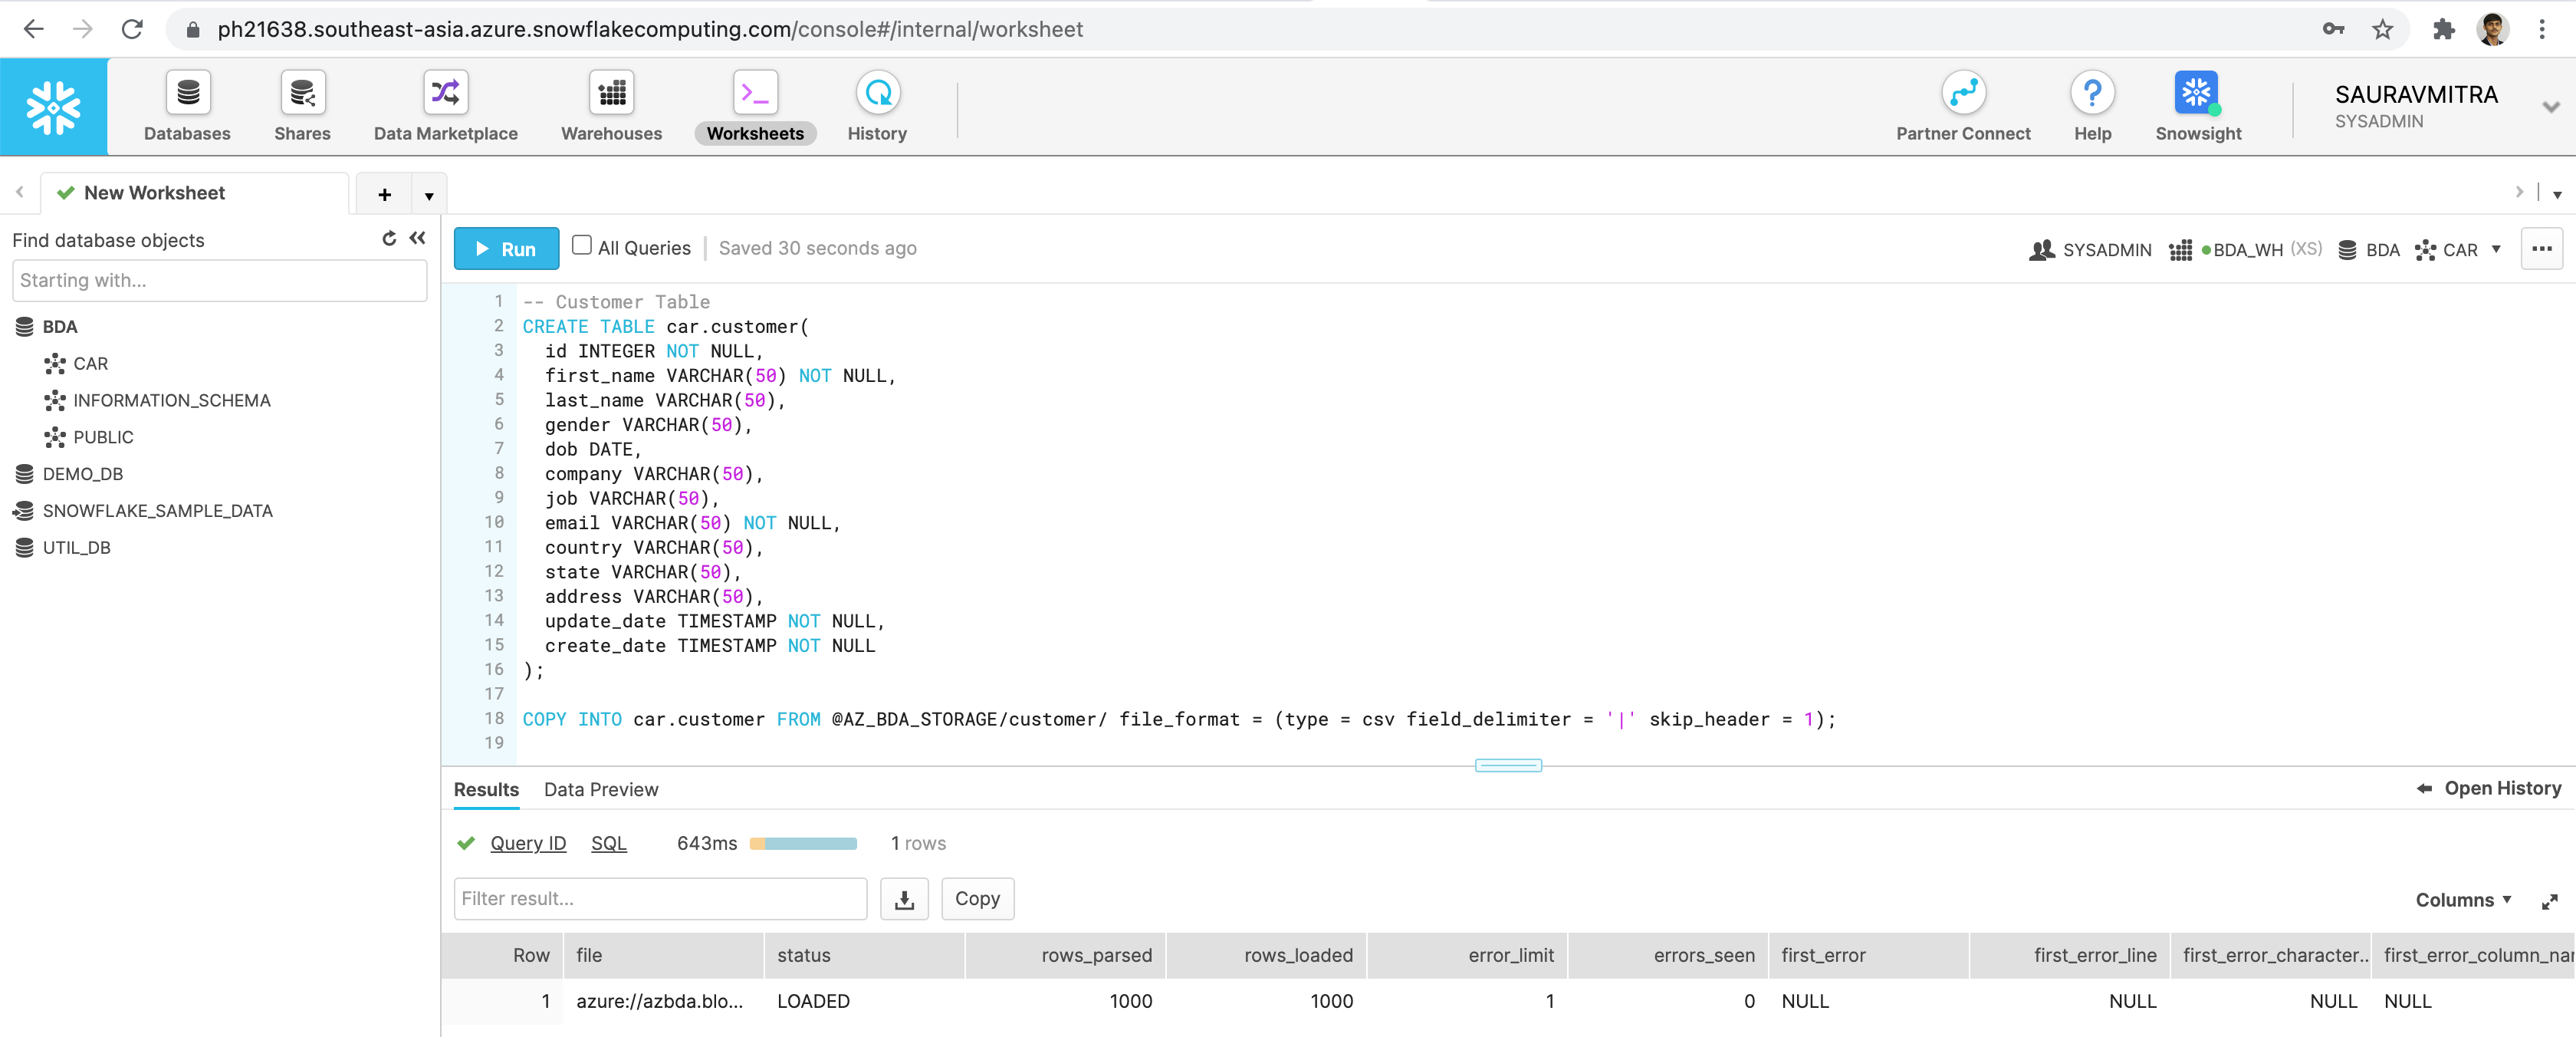
-- Customer Table
CREATE TABLE car.customer(
  id INTEGER NOT NULL,
  first_name VARCHAR(50) NOT NULL,
  last_name VARCHAR(50),
  gender VARCHAR(50),
  dob DATE,
  company VARCHAR(50),
  job VARCHAR(50),
  email VARCHAR(50) NOT NULL,
  country VARCHAR(50),
  state VARCHAR(50),
  address VARCHAR(50),
  update_date TIMESTAMP NOT NULL,
  create_date TIMESTAMP NOT NULL
);

COPY INTO car.customer FROM @AZ_BDA_STORAGE/customer/ file_format = (type = csv field_delimiter = '|' skip_header = 1);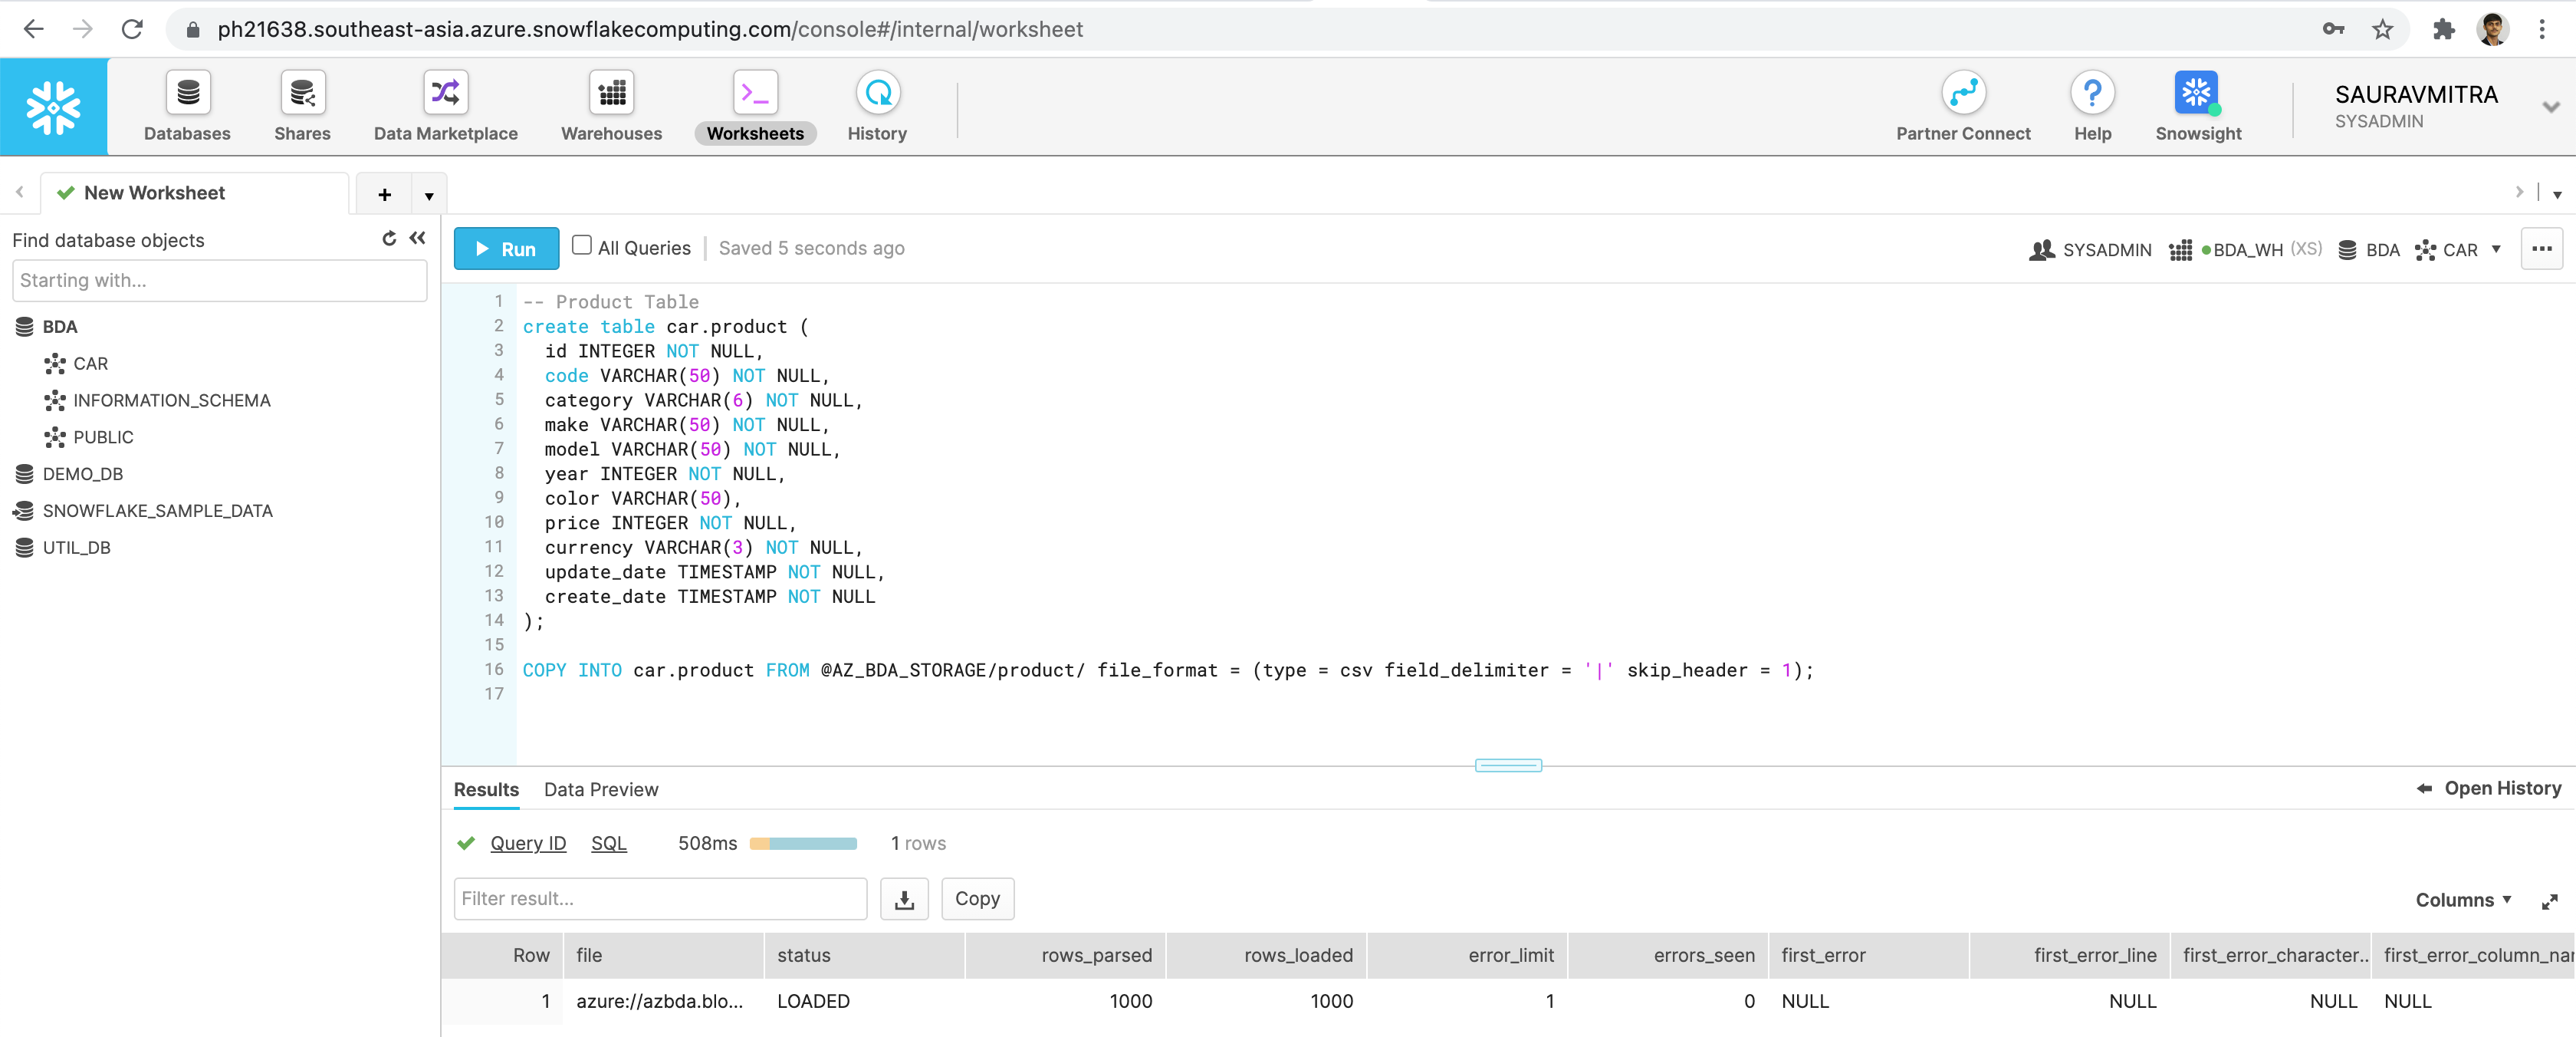
-- Product Table
create table car.product (
  id INTEGER NOT NULL,
  code VARCHAR(50) NOT NULL,
  category VARCHAR(6) NOT NULL,
  make VARCHAR(50) NOT NULL,
  model VARCHAR(50) NOT NULL,
  year INTEGER NOT NULL,
  color VARCHAR(50),
  price INTEGER NOT NULL,
  currency VARCHAR(3) NOT NULL,
  update_date TIMESTAMP NOT NULL,
  create_date TIMESTAMP NOT NULL
);

COPY INTO car.product FROM @AZ_BDA_STORAGE/product/ file_format = (type = csv field_delimiter = '|' skip_header = 1);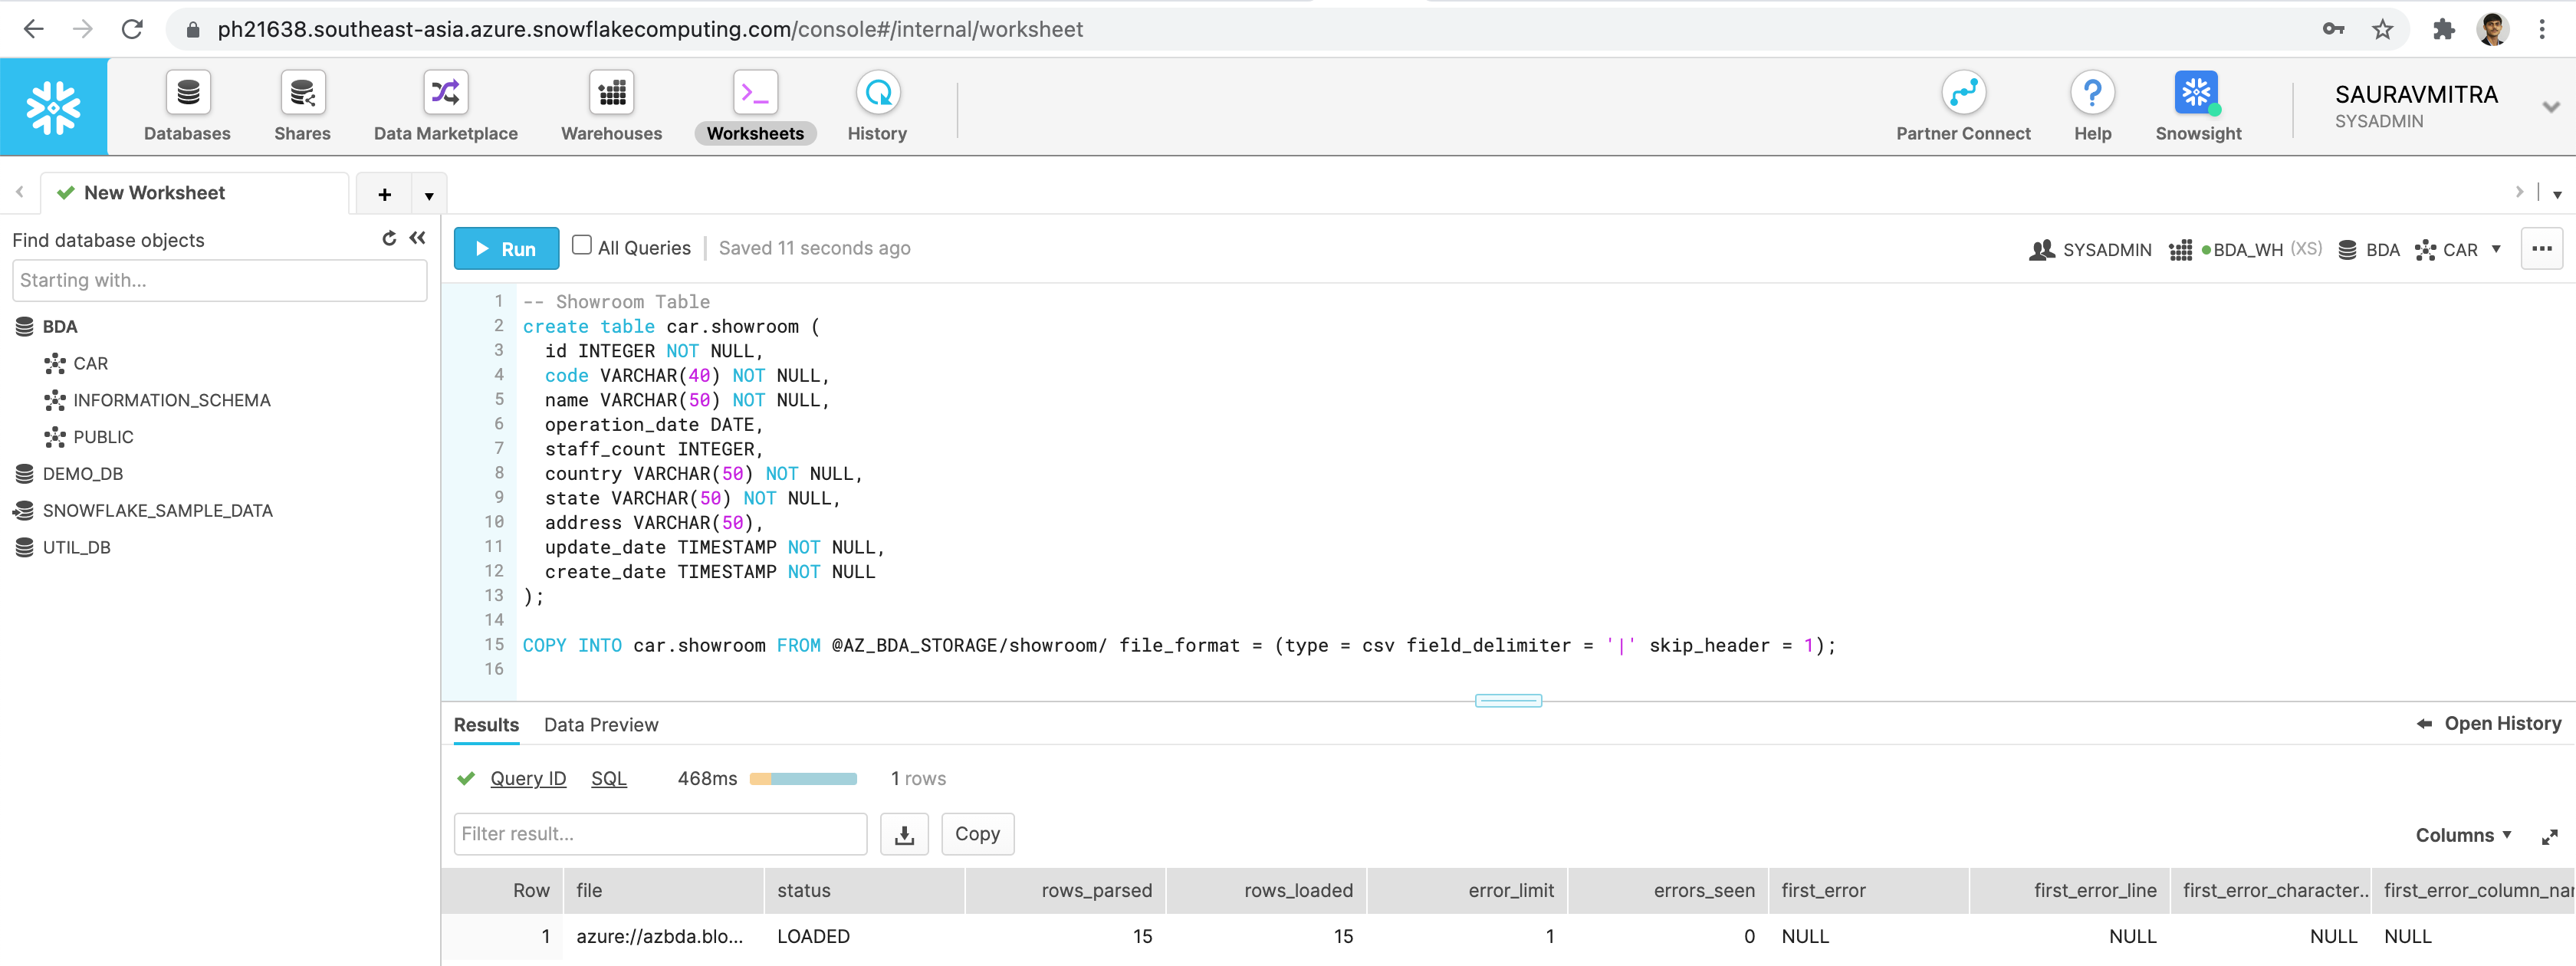
-- Showroom Table
create table car.showroom (
  id INTEGER NOT NULL,
  code VARCHAR(40) NOT NULL,
  name VARCHAR(50) NOT NULL,
  operation_date DATE,
  staff_count INTEGER,
  country VARCHAR(50) NOT NULL,
  state VARCHAR(50) NOT NULL,
  address VARCHAR(50),
  update_date TIMESTAMP NOT NULL,
  create_date TIMESTAMP NOT NULL
);

COPY INTO car.showroom FROM @AZ_BDA_STORAGE/showroom/ file_format = (type = csv field_delimiter = '|' skip_header = 1);
-- Sales Table
create table car.sales (
  id INTEGER NOT NULL ,
  order_number VARCHAR(50) NOT NULL,
  customer_id INTEGER NOT NULL,
  showroom_id INTEGER NOT NULL,
  product_id INTEGER NOT NULL,
  quantity INTEGER NOT NULL,
  discount INTEGER,
  amount INTEGER,
  delivered VARCHAR(50),
  card_type VARCHAR(50) NOT NULL,
  card_number VARCHAR(50) NOT NULL,
  txn_date DATE,
  update_date TIMESTAMP NOT NULL,
  create_date TIMESTAMP NOT NULL
);

COPY INTO car.sales FROM @AZ_BDA_STORAGE/sales/ file_format = (type = csv field_delimiter = '|' skip_header = 1);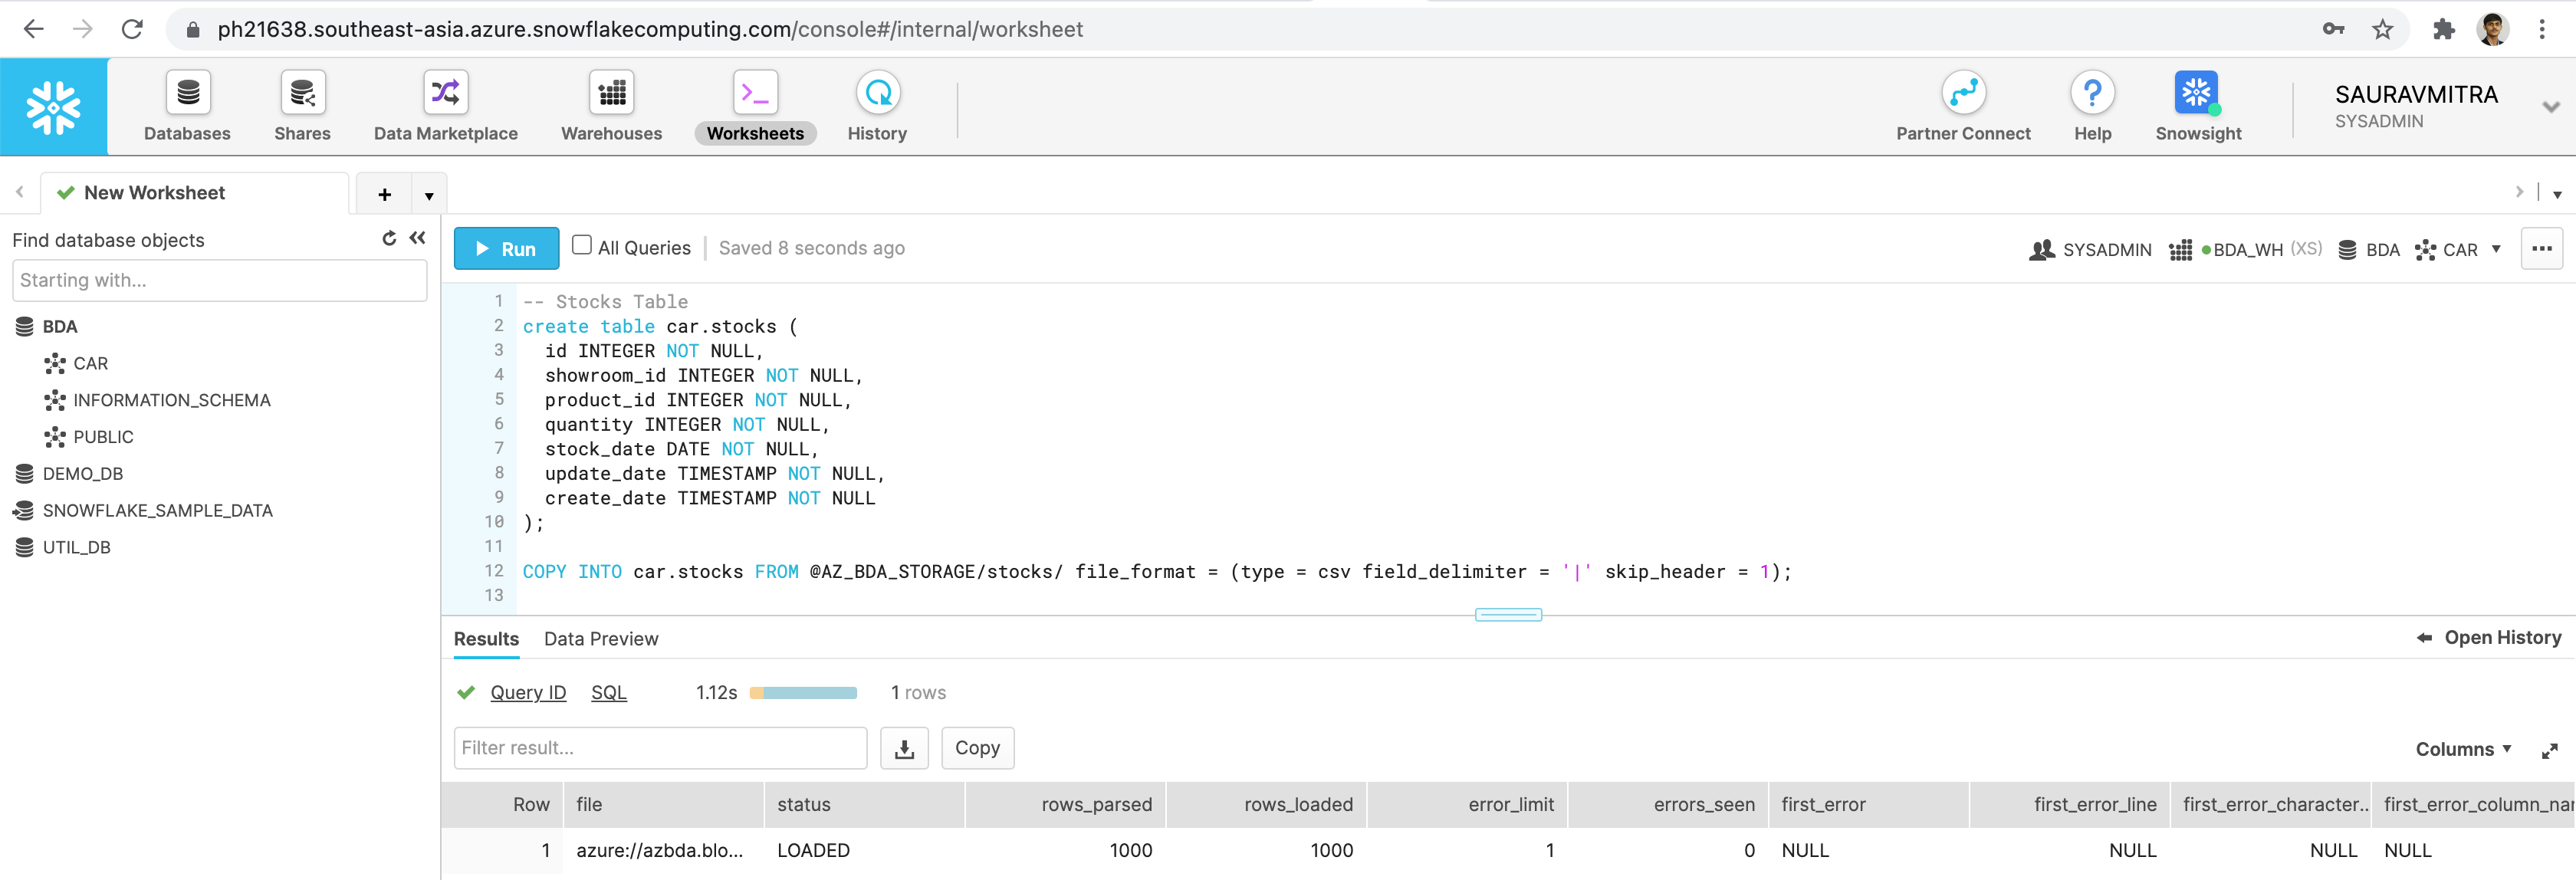
-- Stocks Table
create table car.stocks (
  id INTEGER NOT NULL,
  showroom_id INTEGER NOT NULL,
  product_id INTEGER NOT NULL,
  quantity INTEGER NOT NULL,
  stock_date DATE NOT NULL,
  update_date TIMESTAMP NOT NULL,
  create_date TIMESTAMP NOT NULL
);

COPY INTO car.stocks FROM @AZ_BDA_STORAGE/stocks/ file_format = (type = csv field_delimiter = '|' skip_header = 1);
Now that our tables are created & data loaded into the tables from our external data files, we are going to perform a DML operation to update the Amount field in our Sales table.
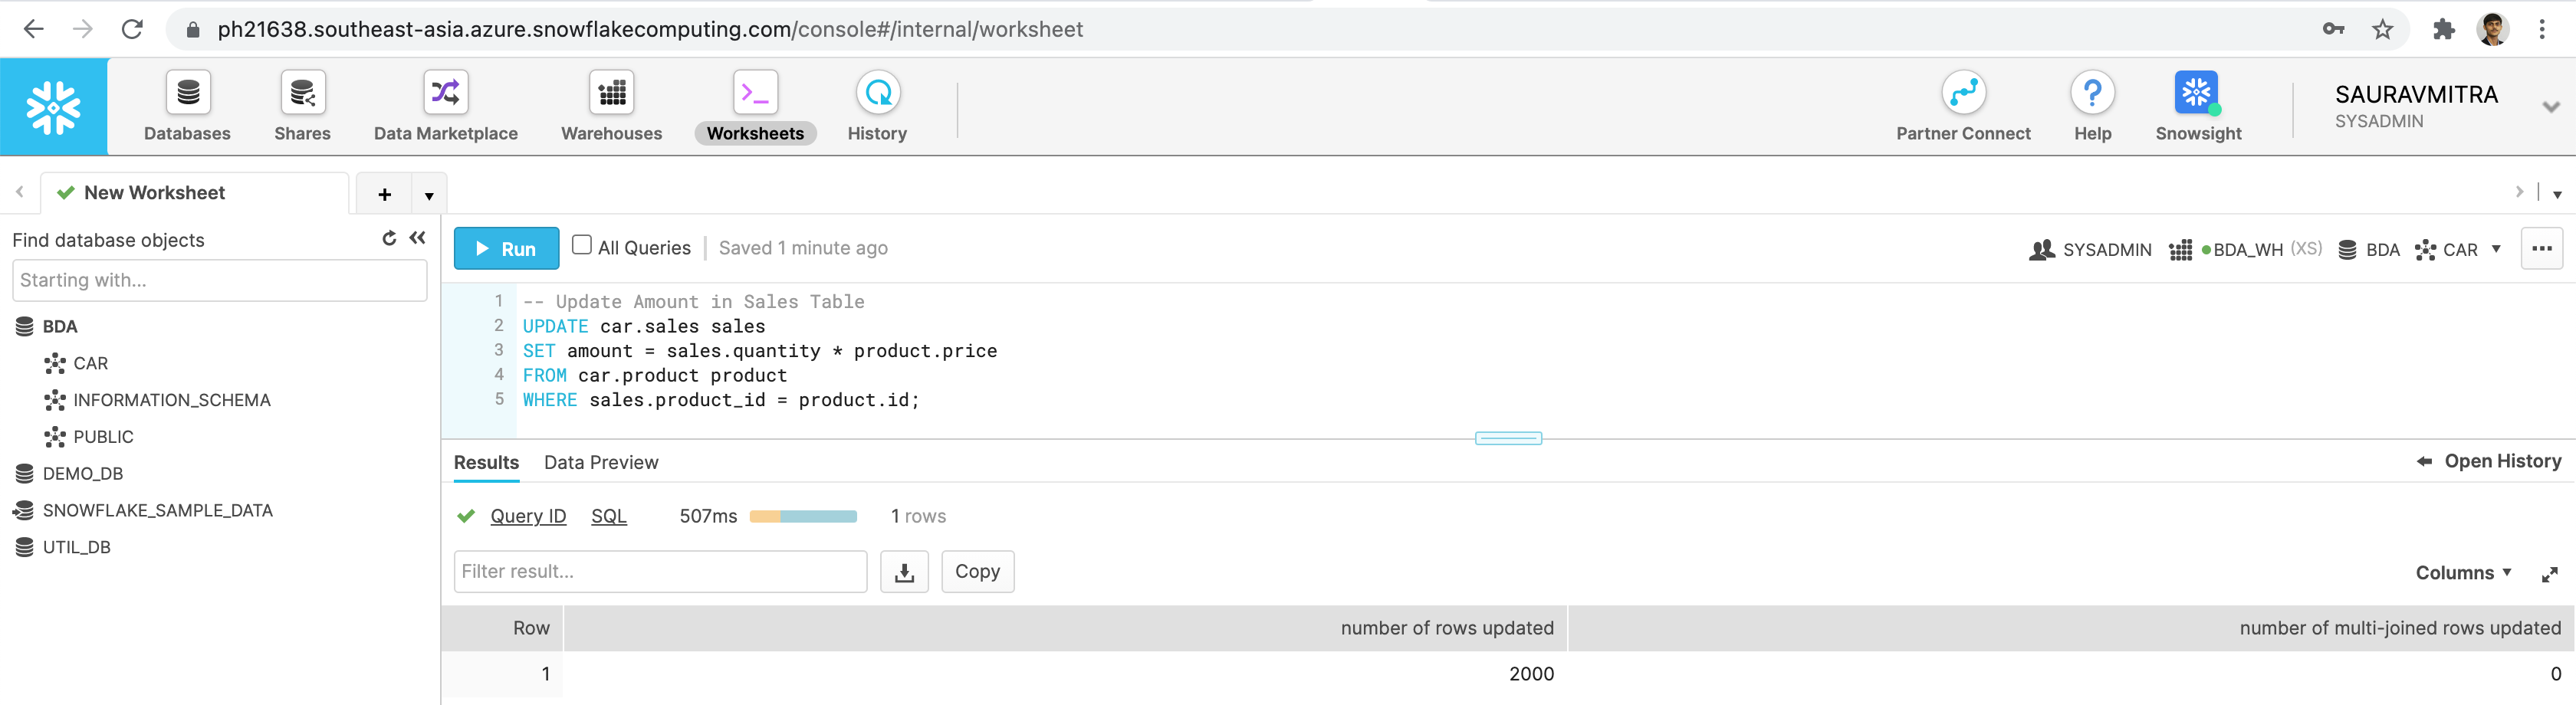
-- Update Amount in Sales Table
UPDATE car.sales sales
SET amount = sales.quantity * product.price
FROM car.product product
WHERE sales.product_id = product.id;
Finally, let us perform some complex SQL query to analyze our dataset.
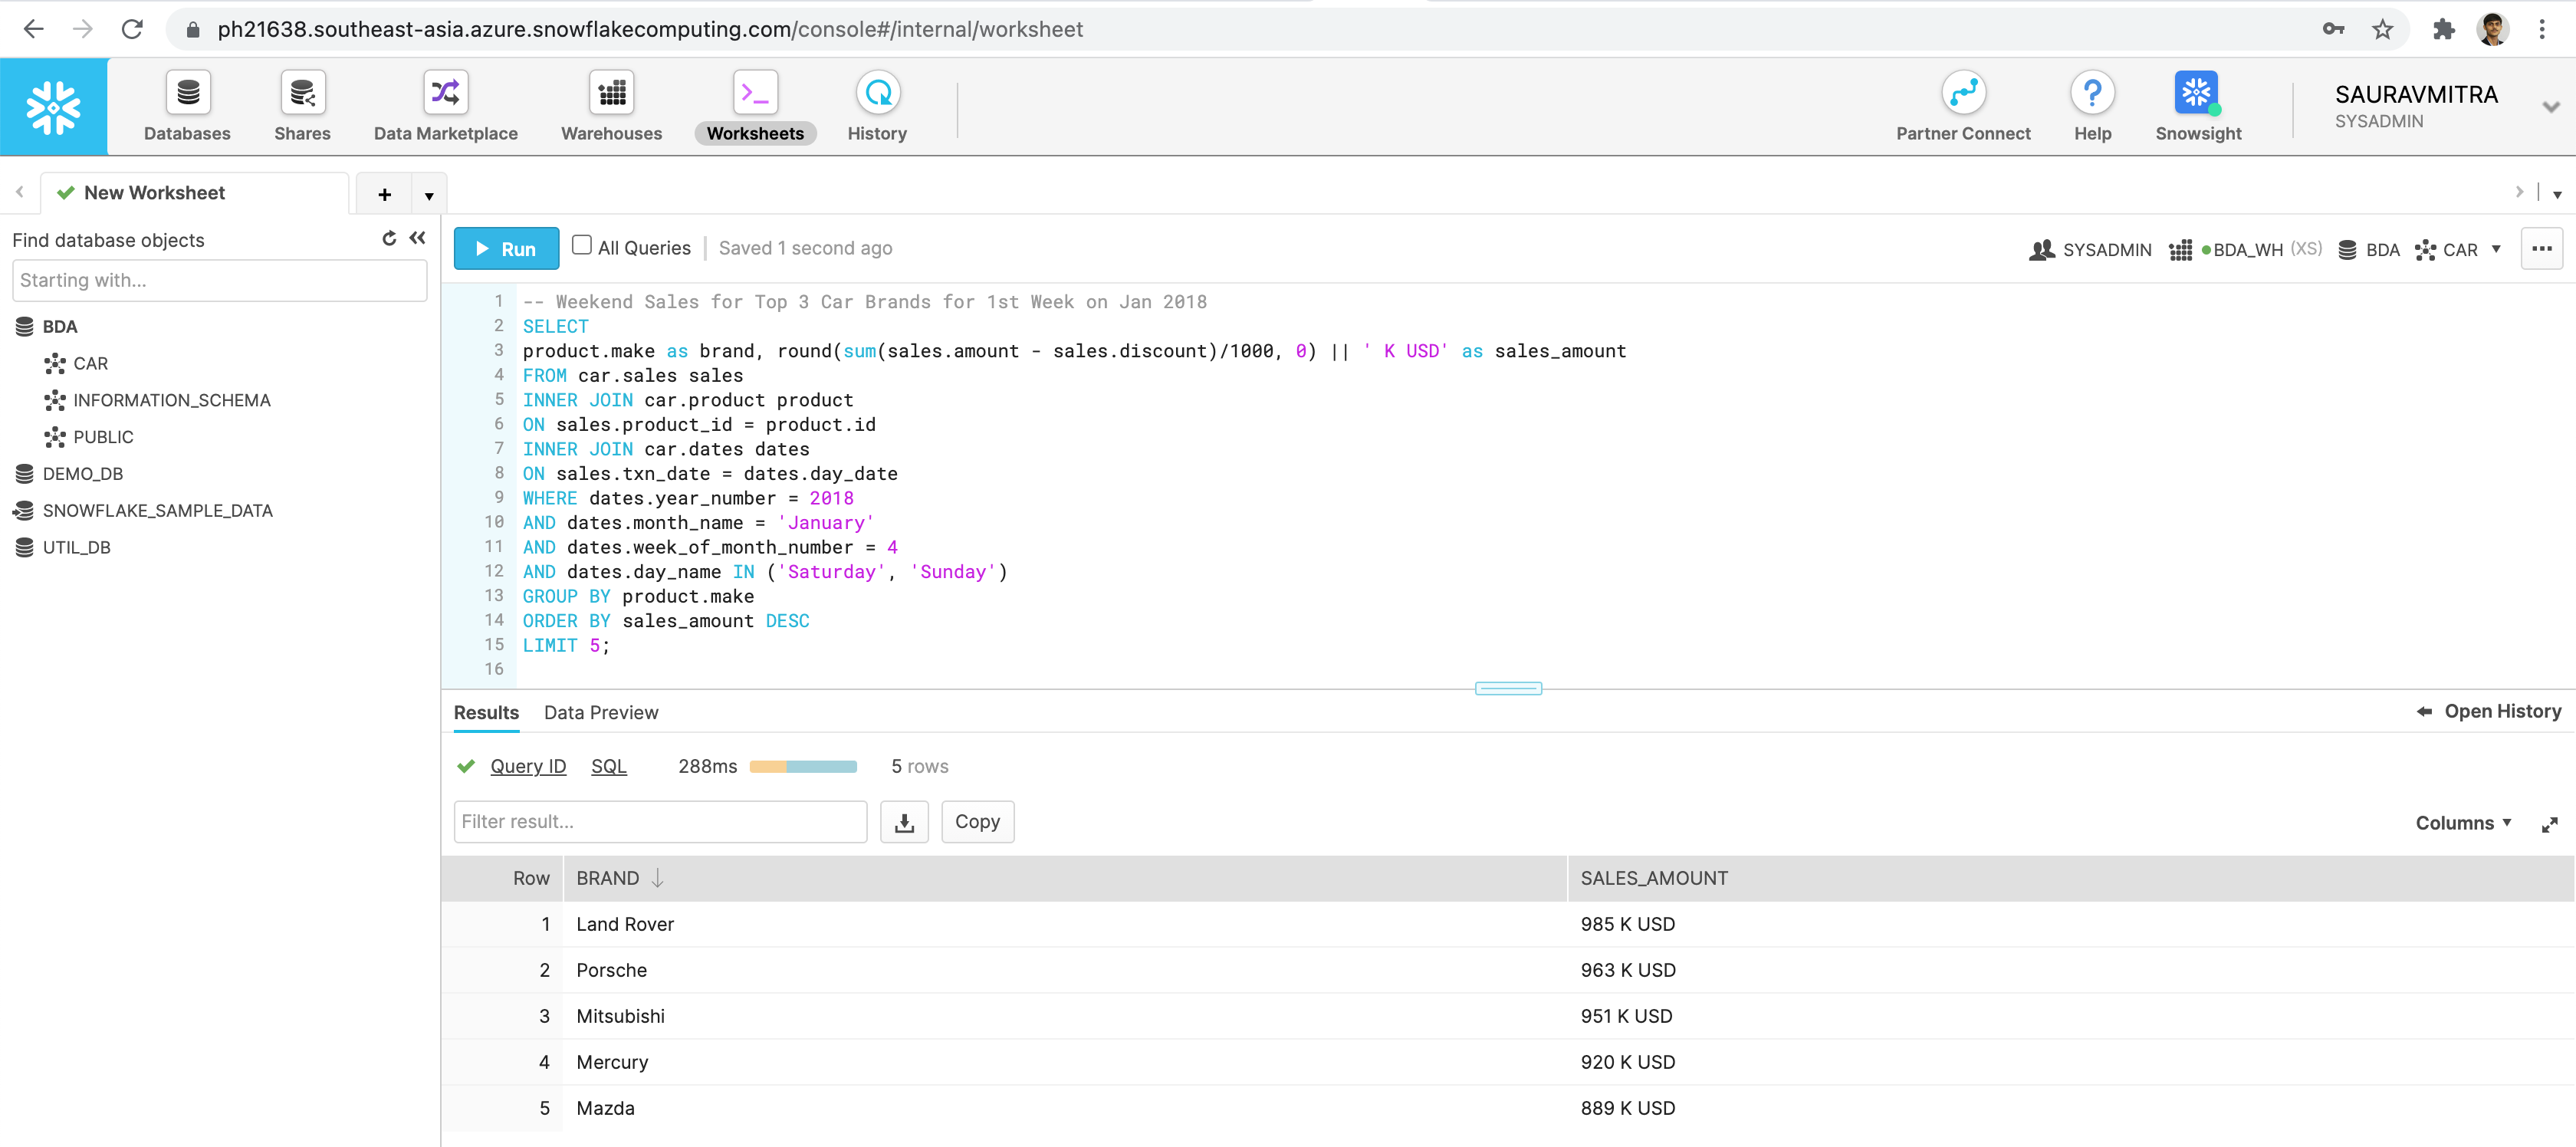
-- Weekend Sales for Top 5 Car Brands for 1st Week on Jan 2018
SELECT
product.make as brand, round(sum(sales.amount - sales.discount)/1000, 0) || ' K USD' as sales_amount
FROM car.sales sales
INNER JOIN car.product product
ON sales.product_id = product.id
INNER JOIN car.dates dates
ON sales.txn_date = dates.day_date
WHERE dates.year_number = 2018
AND dates.month_name = 'January'
AND dates.week_of_month_number = 4
AND dates.day_name IN ('Saturday', 'Sunday')
GROUP BY product.make
ORDER BY sales_amount DESC
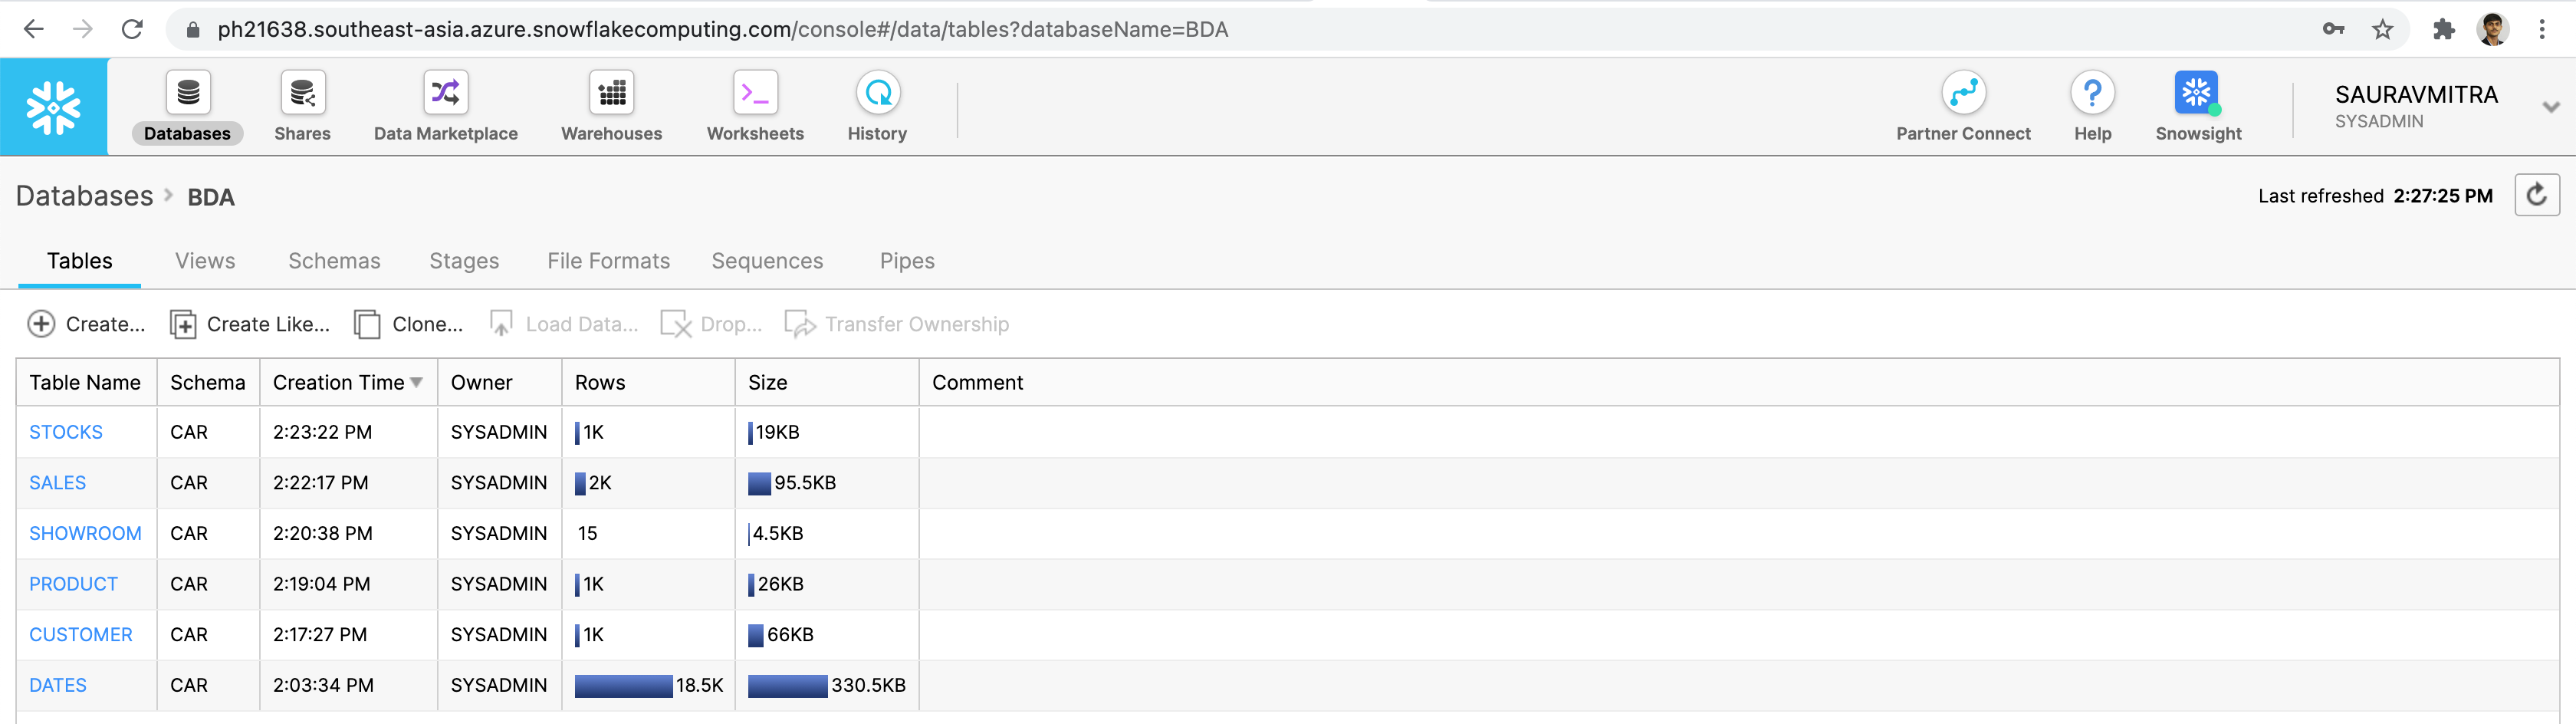
LIMIT 5;Let's go back to the Databases page & take a look into the table statistics.
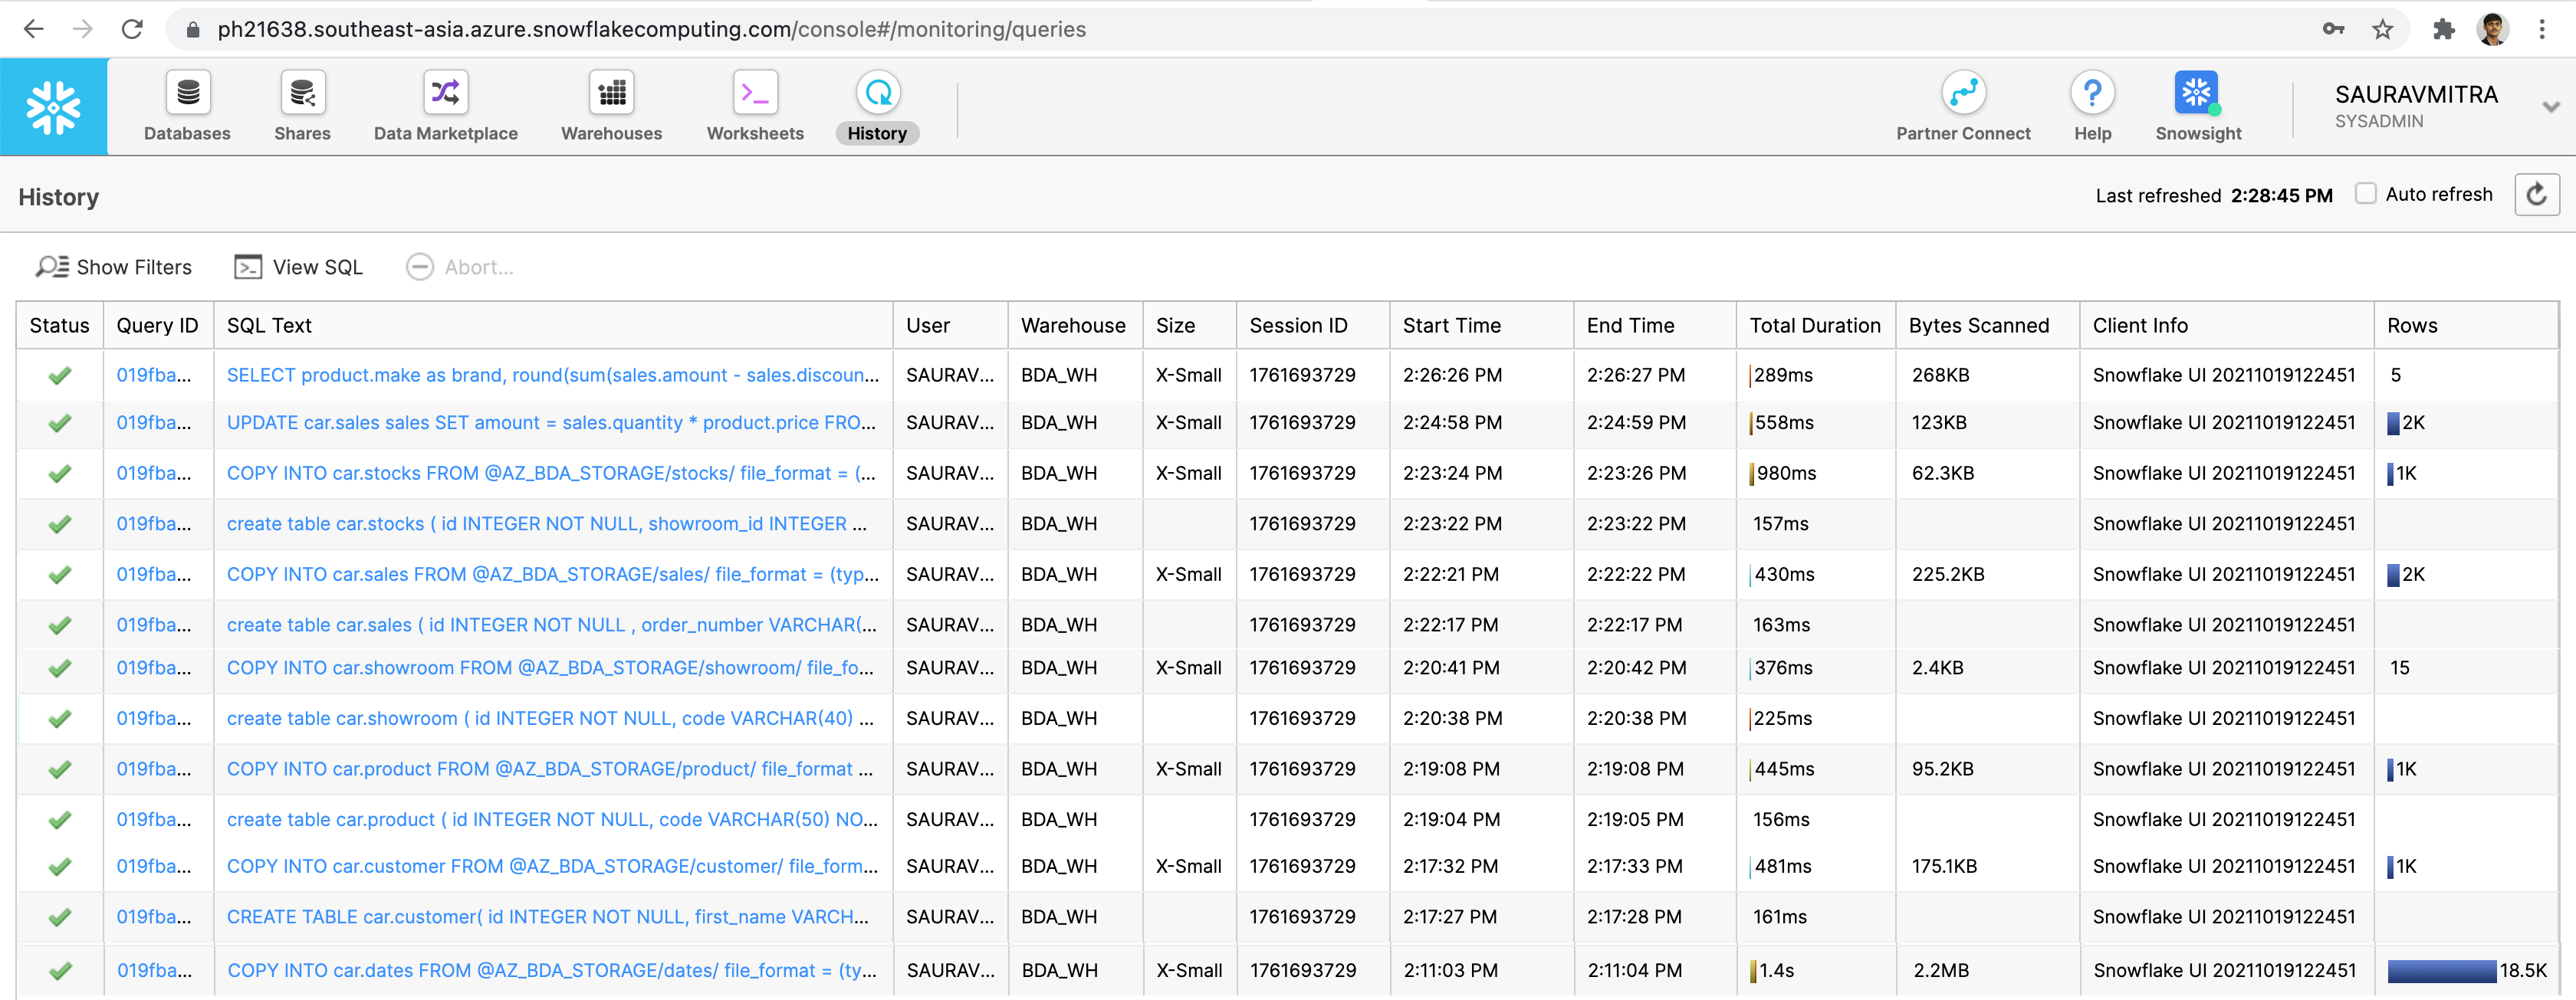
Next go to the History page, to view and drill into the details of all queries executed. Check the execution statistics of our DDL, DML & DQL operations.
For Terraform Automation of Snowflake Resources, refer the github repository.